

Bunnies
A passive desktop hifi speaker that I spearheaded in development whilst my time in crafter’s lab.
In association with

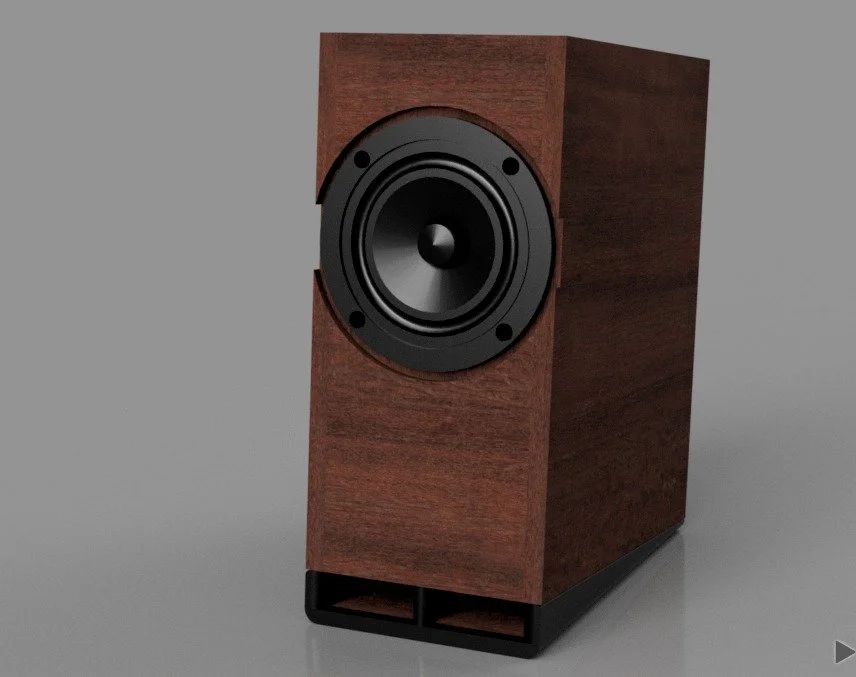
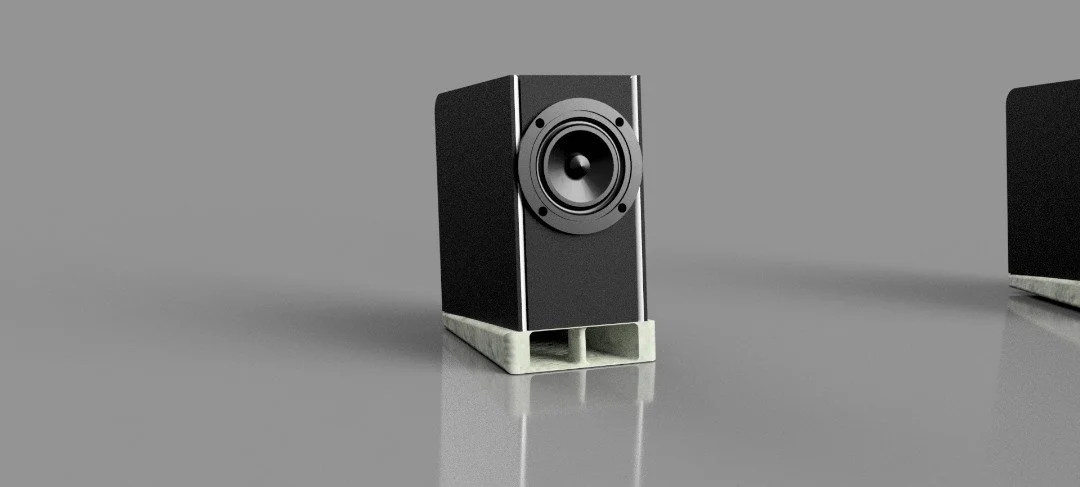
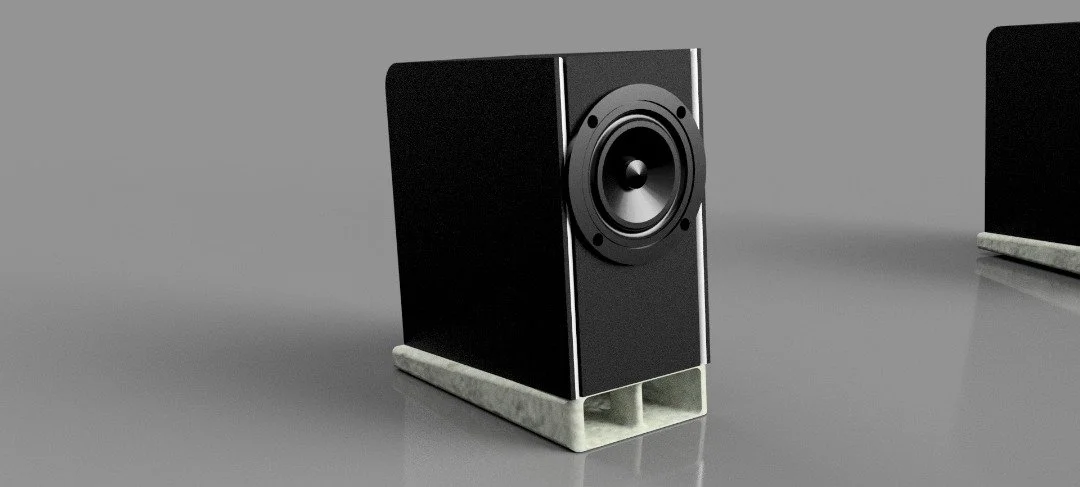
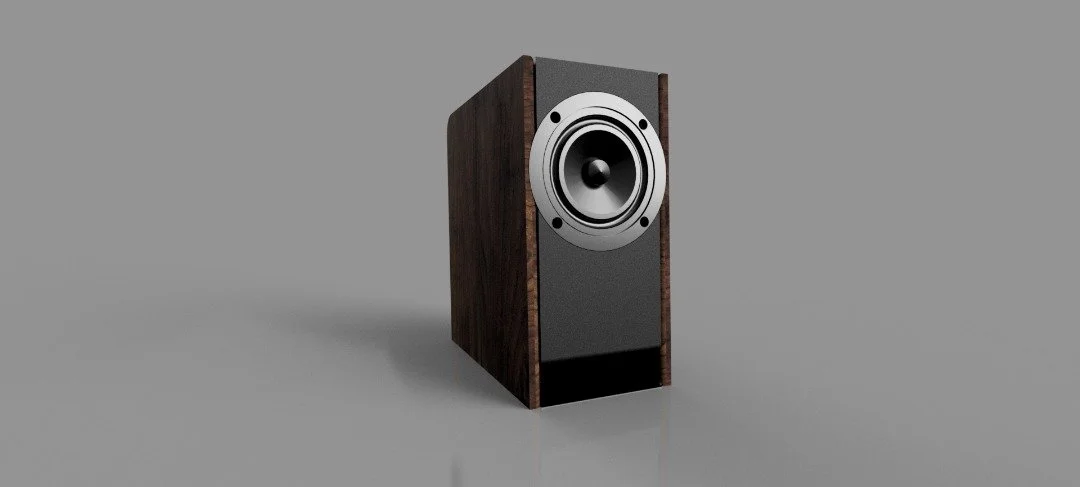
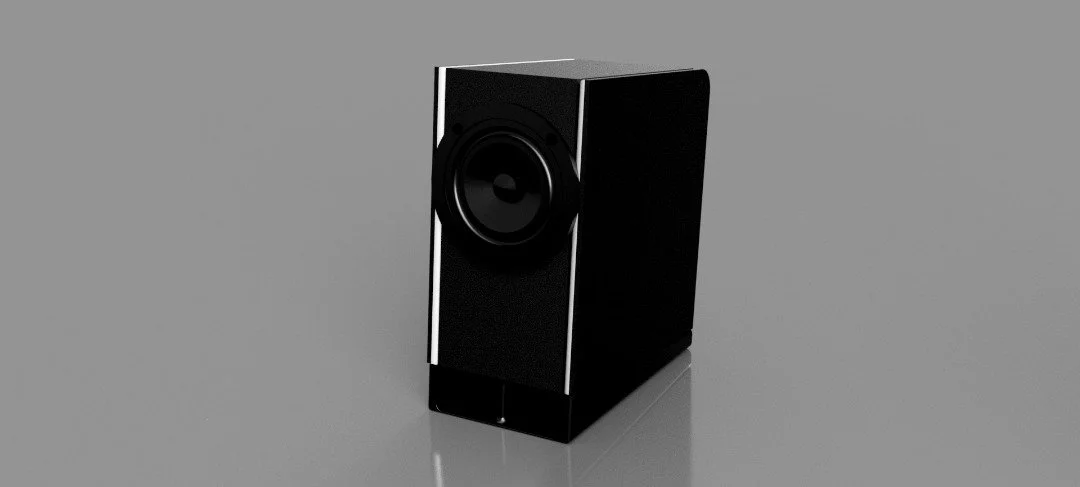
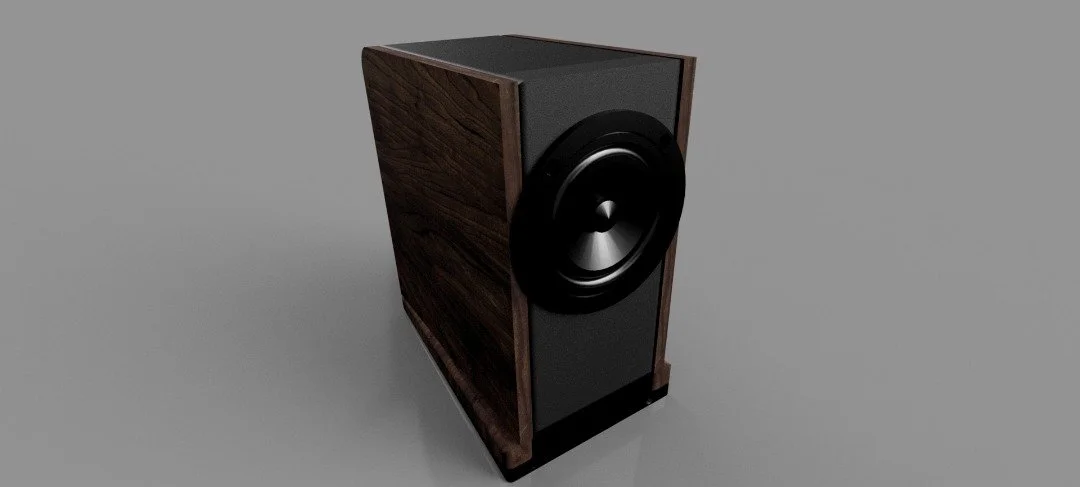
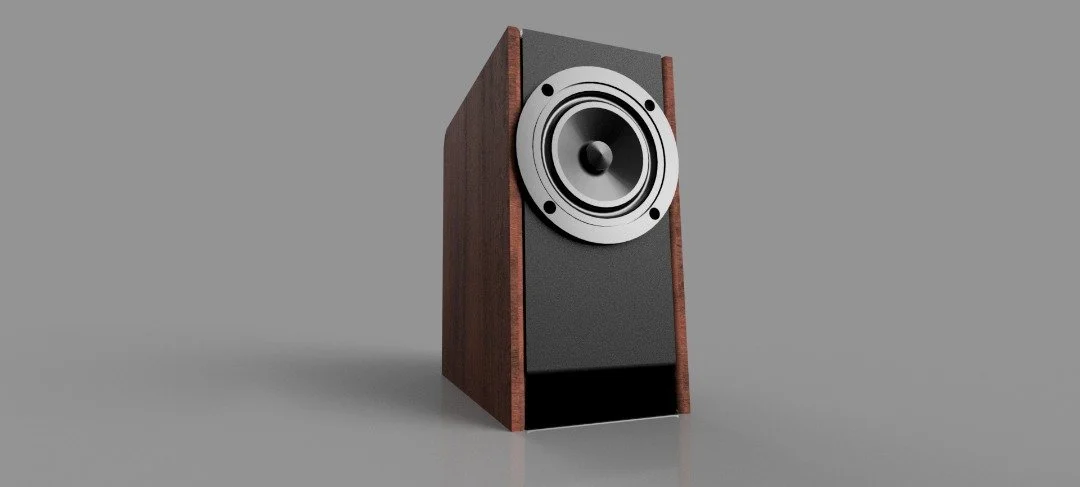
Finish product

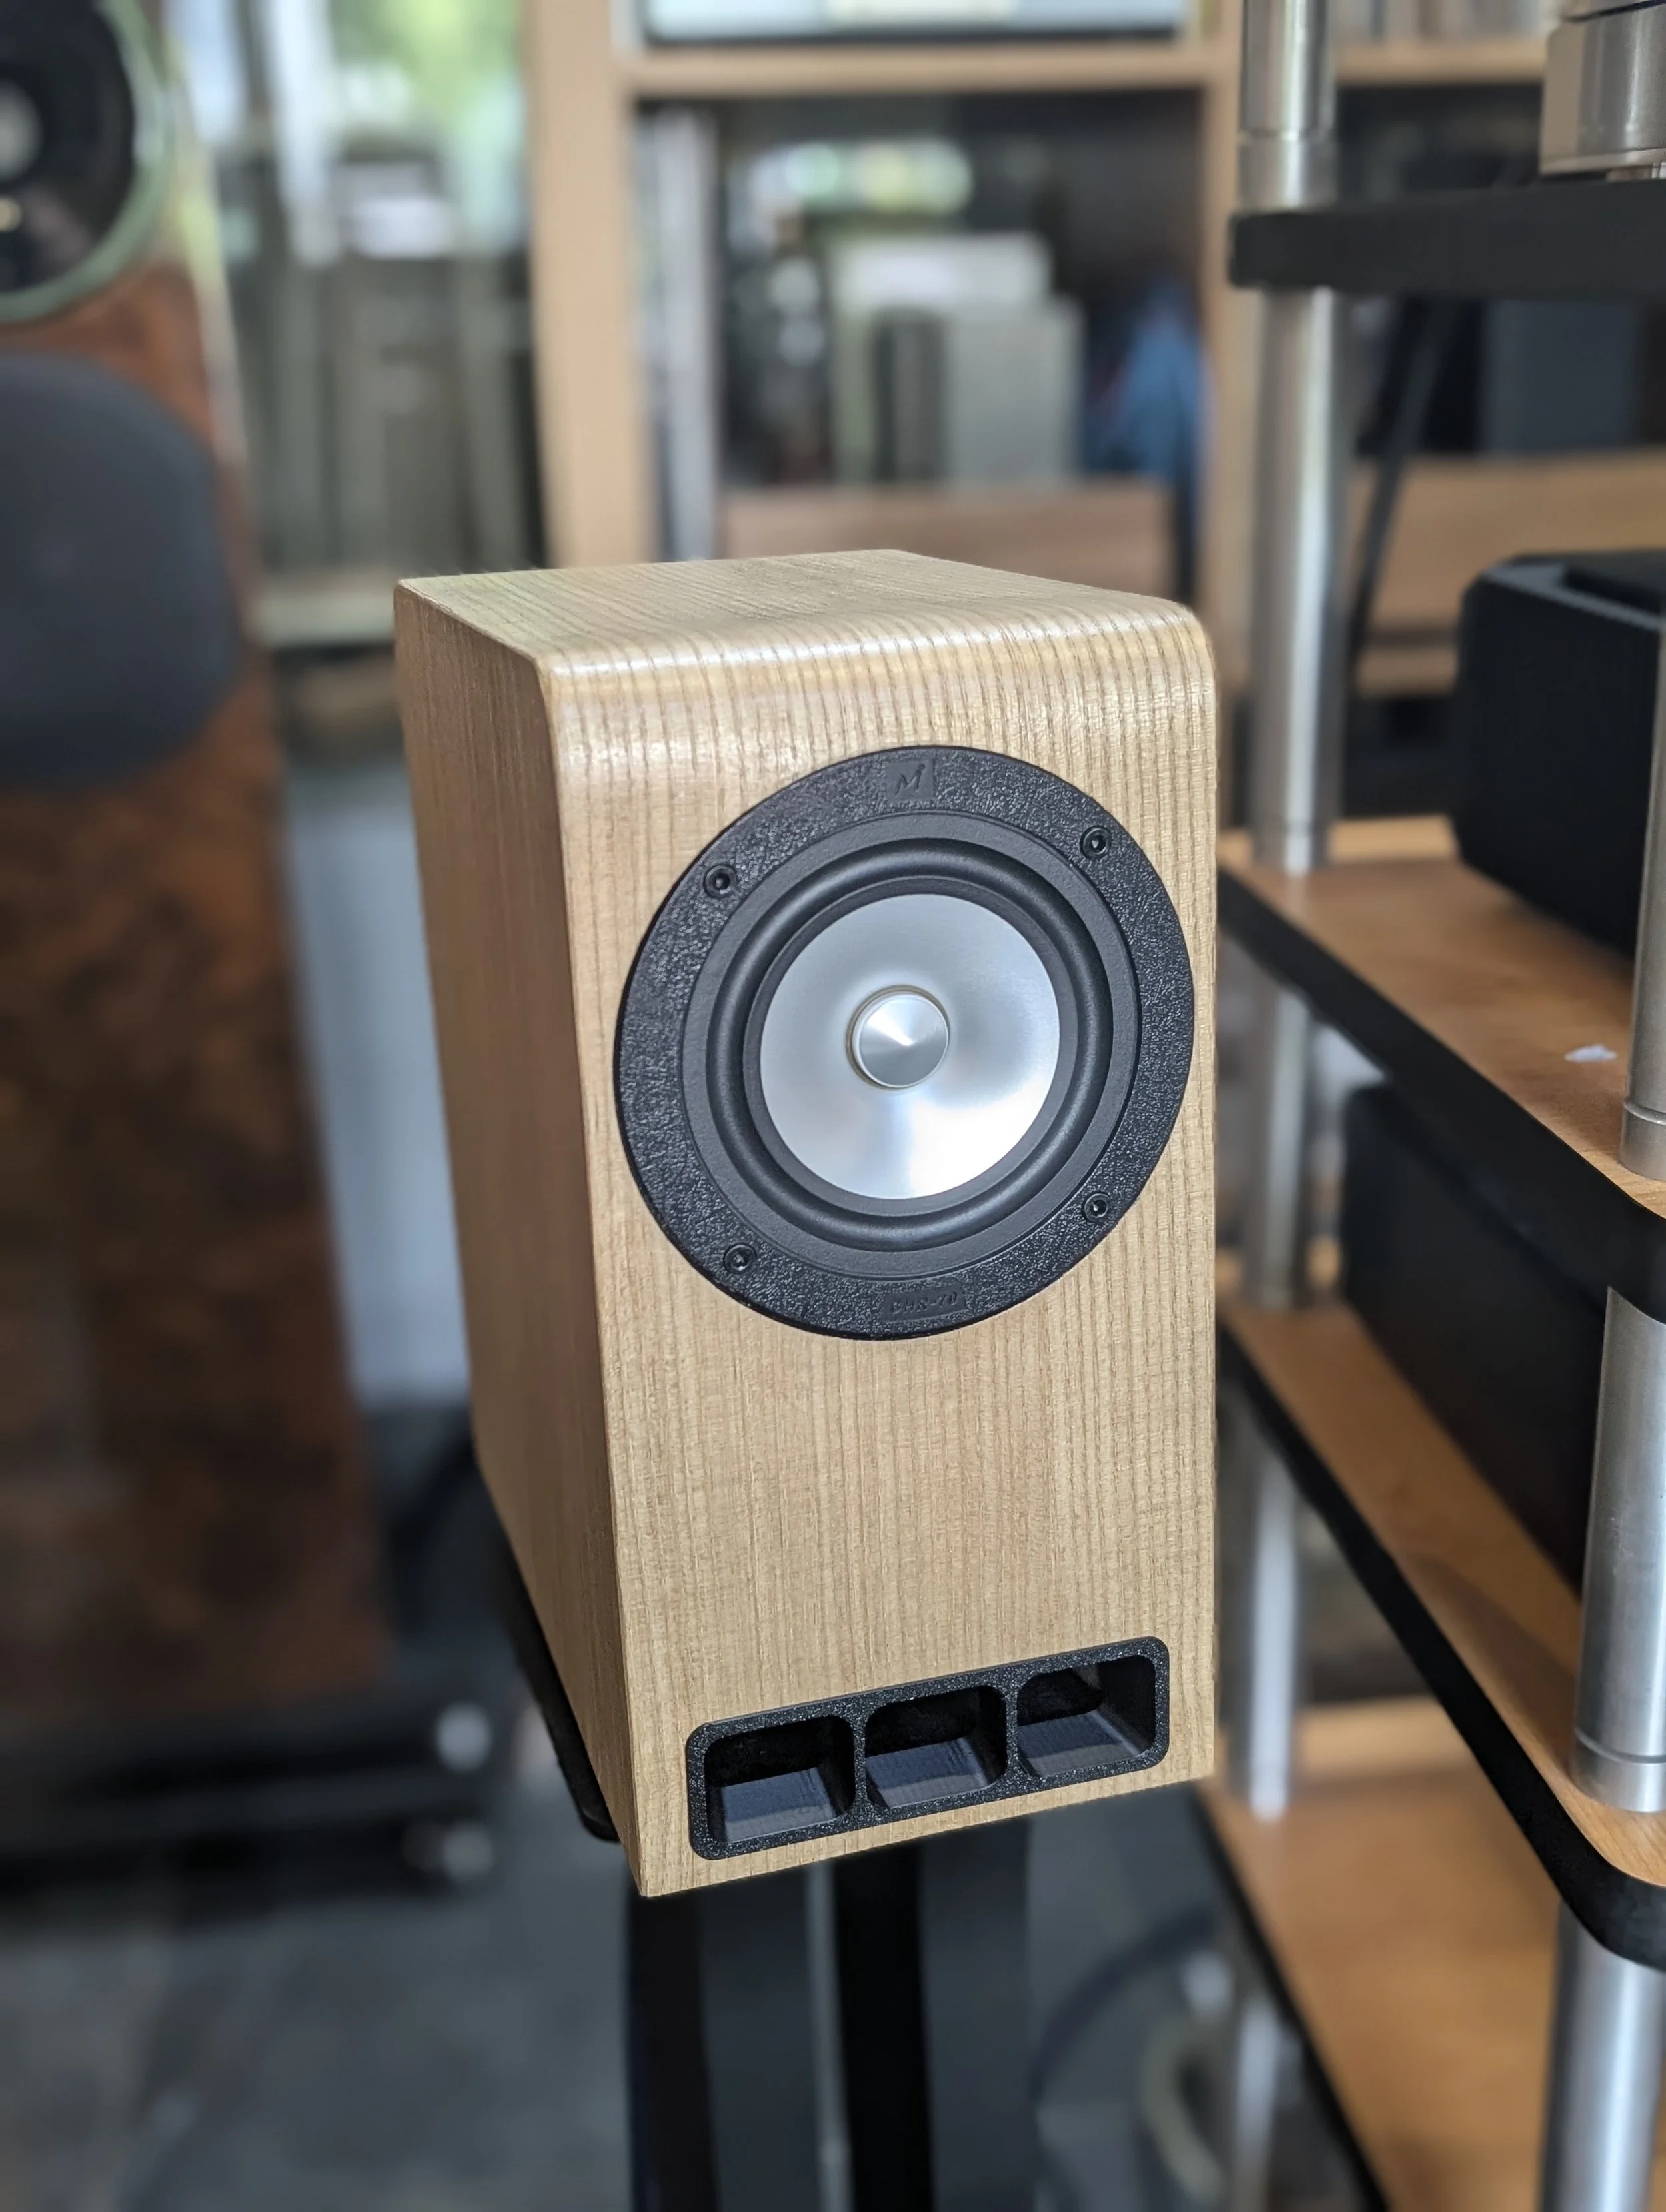
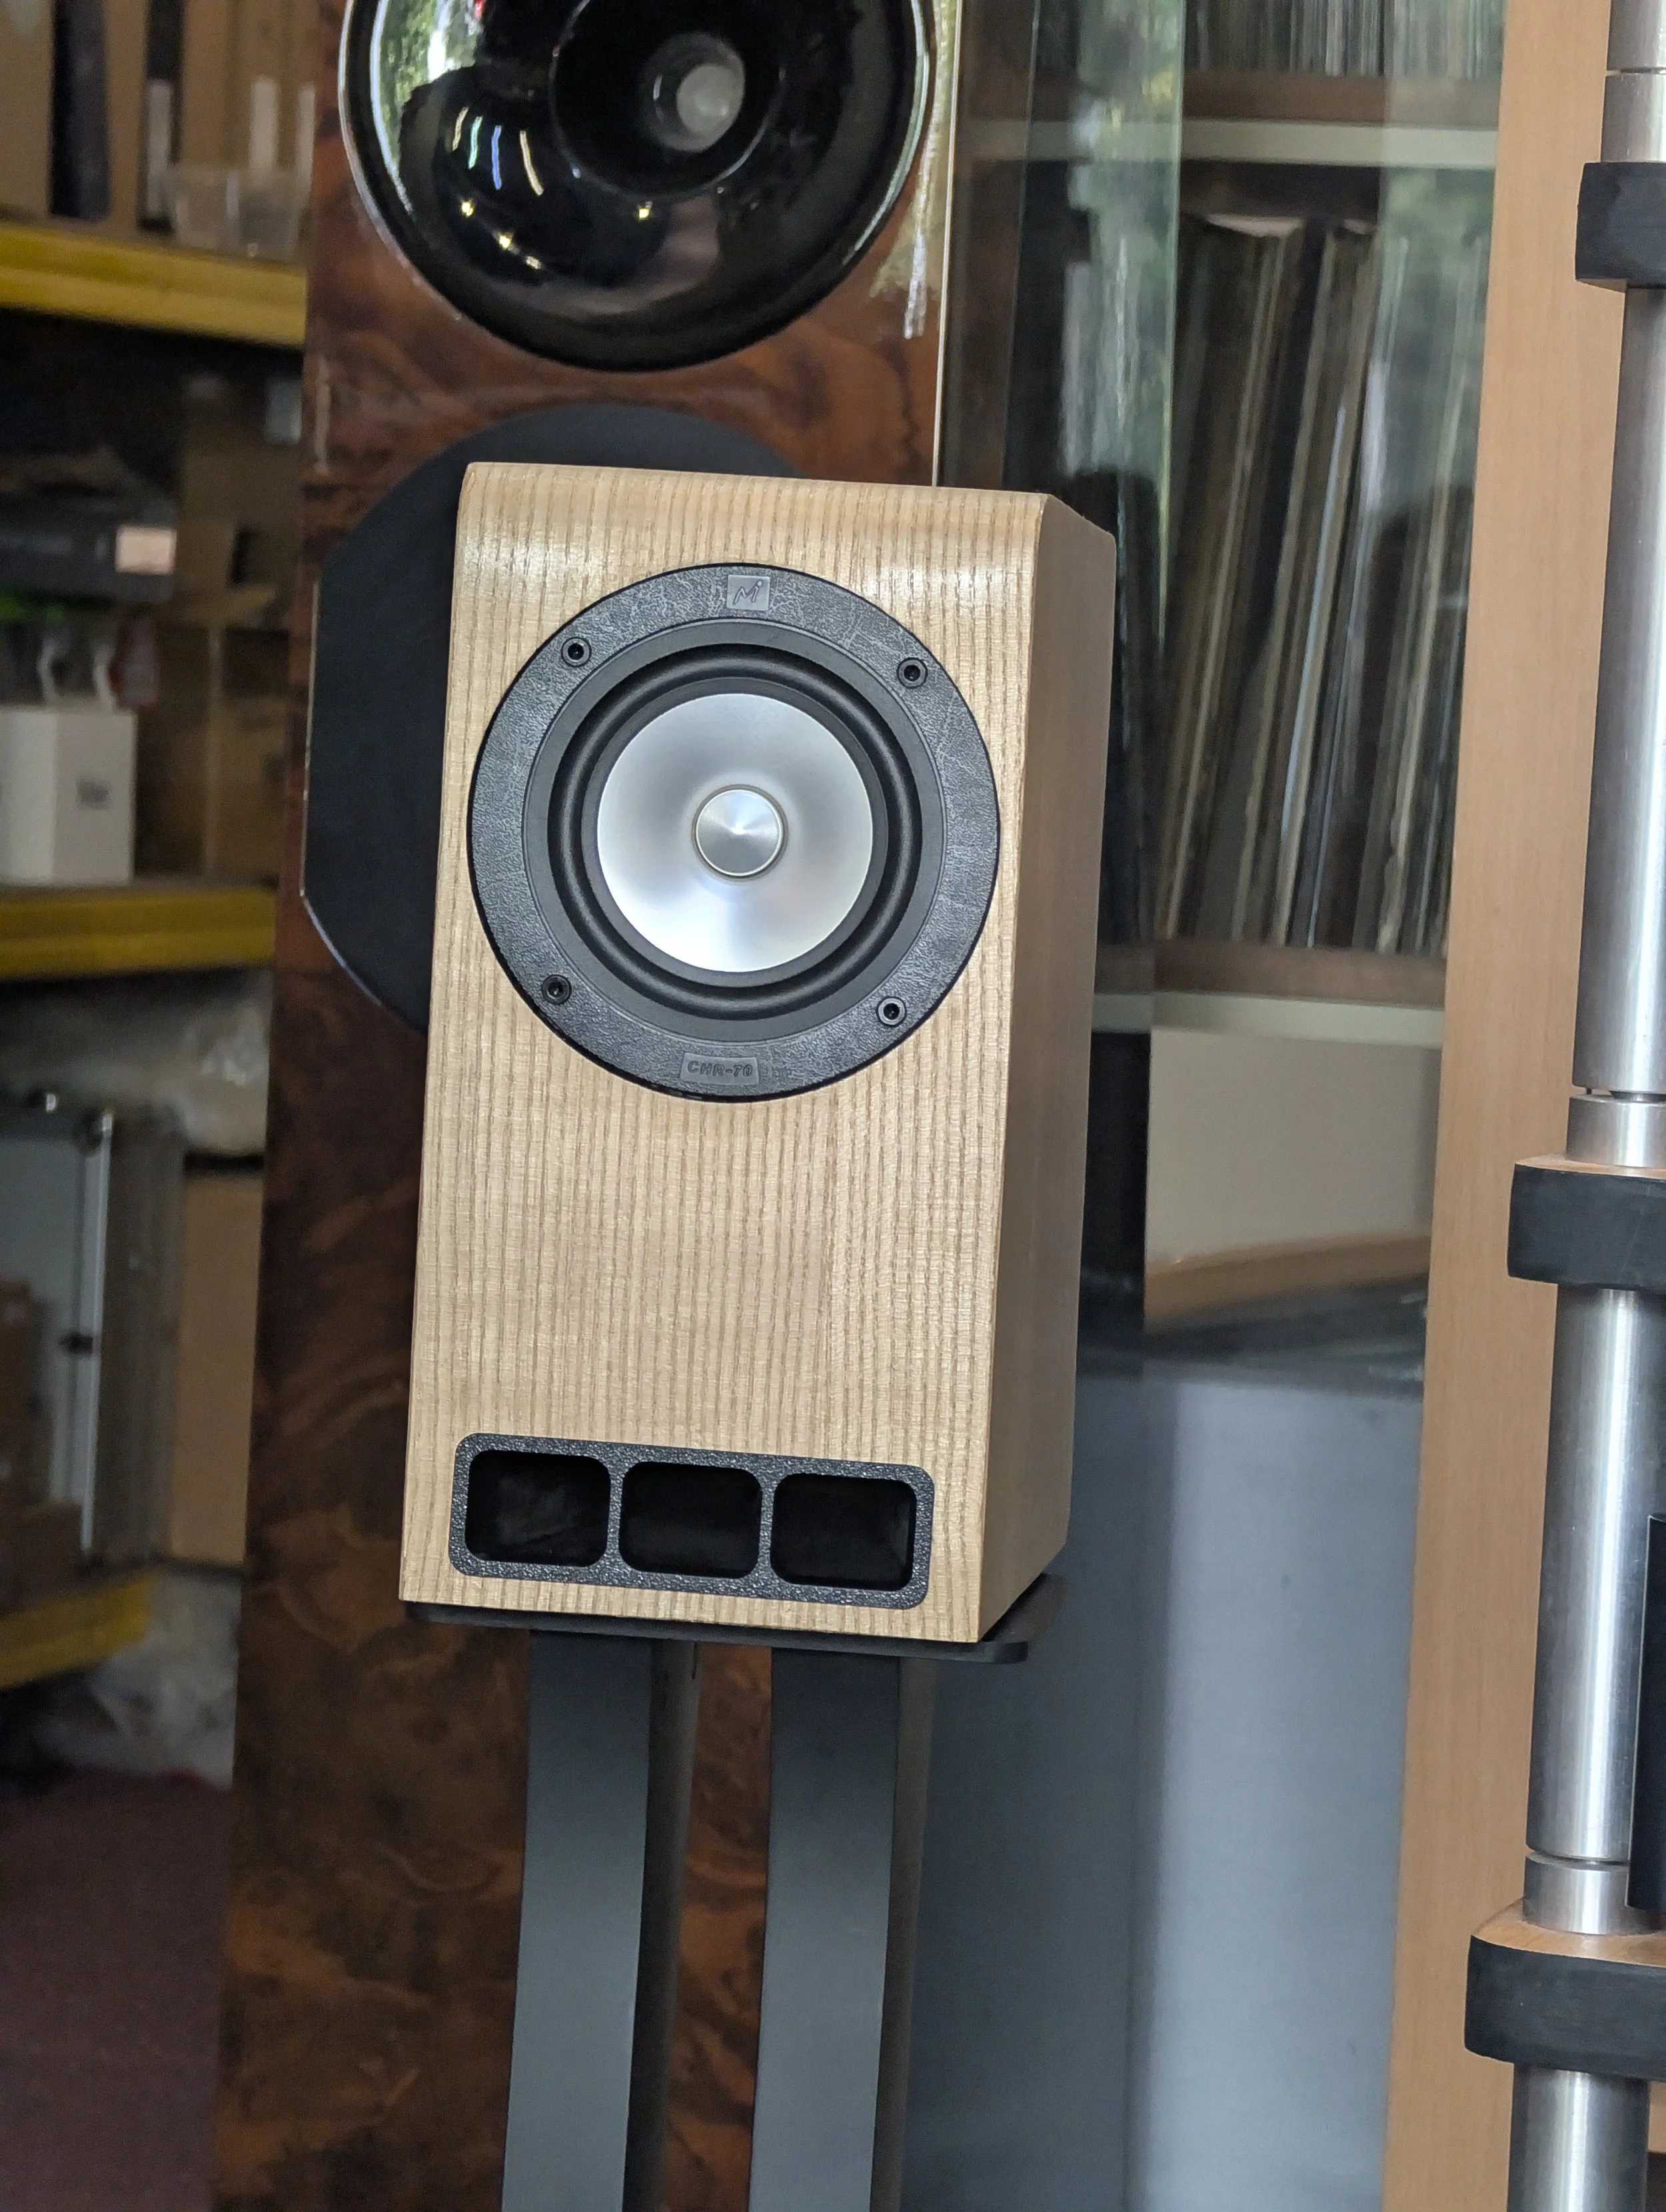
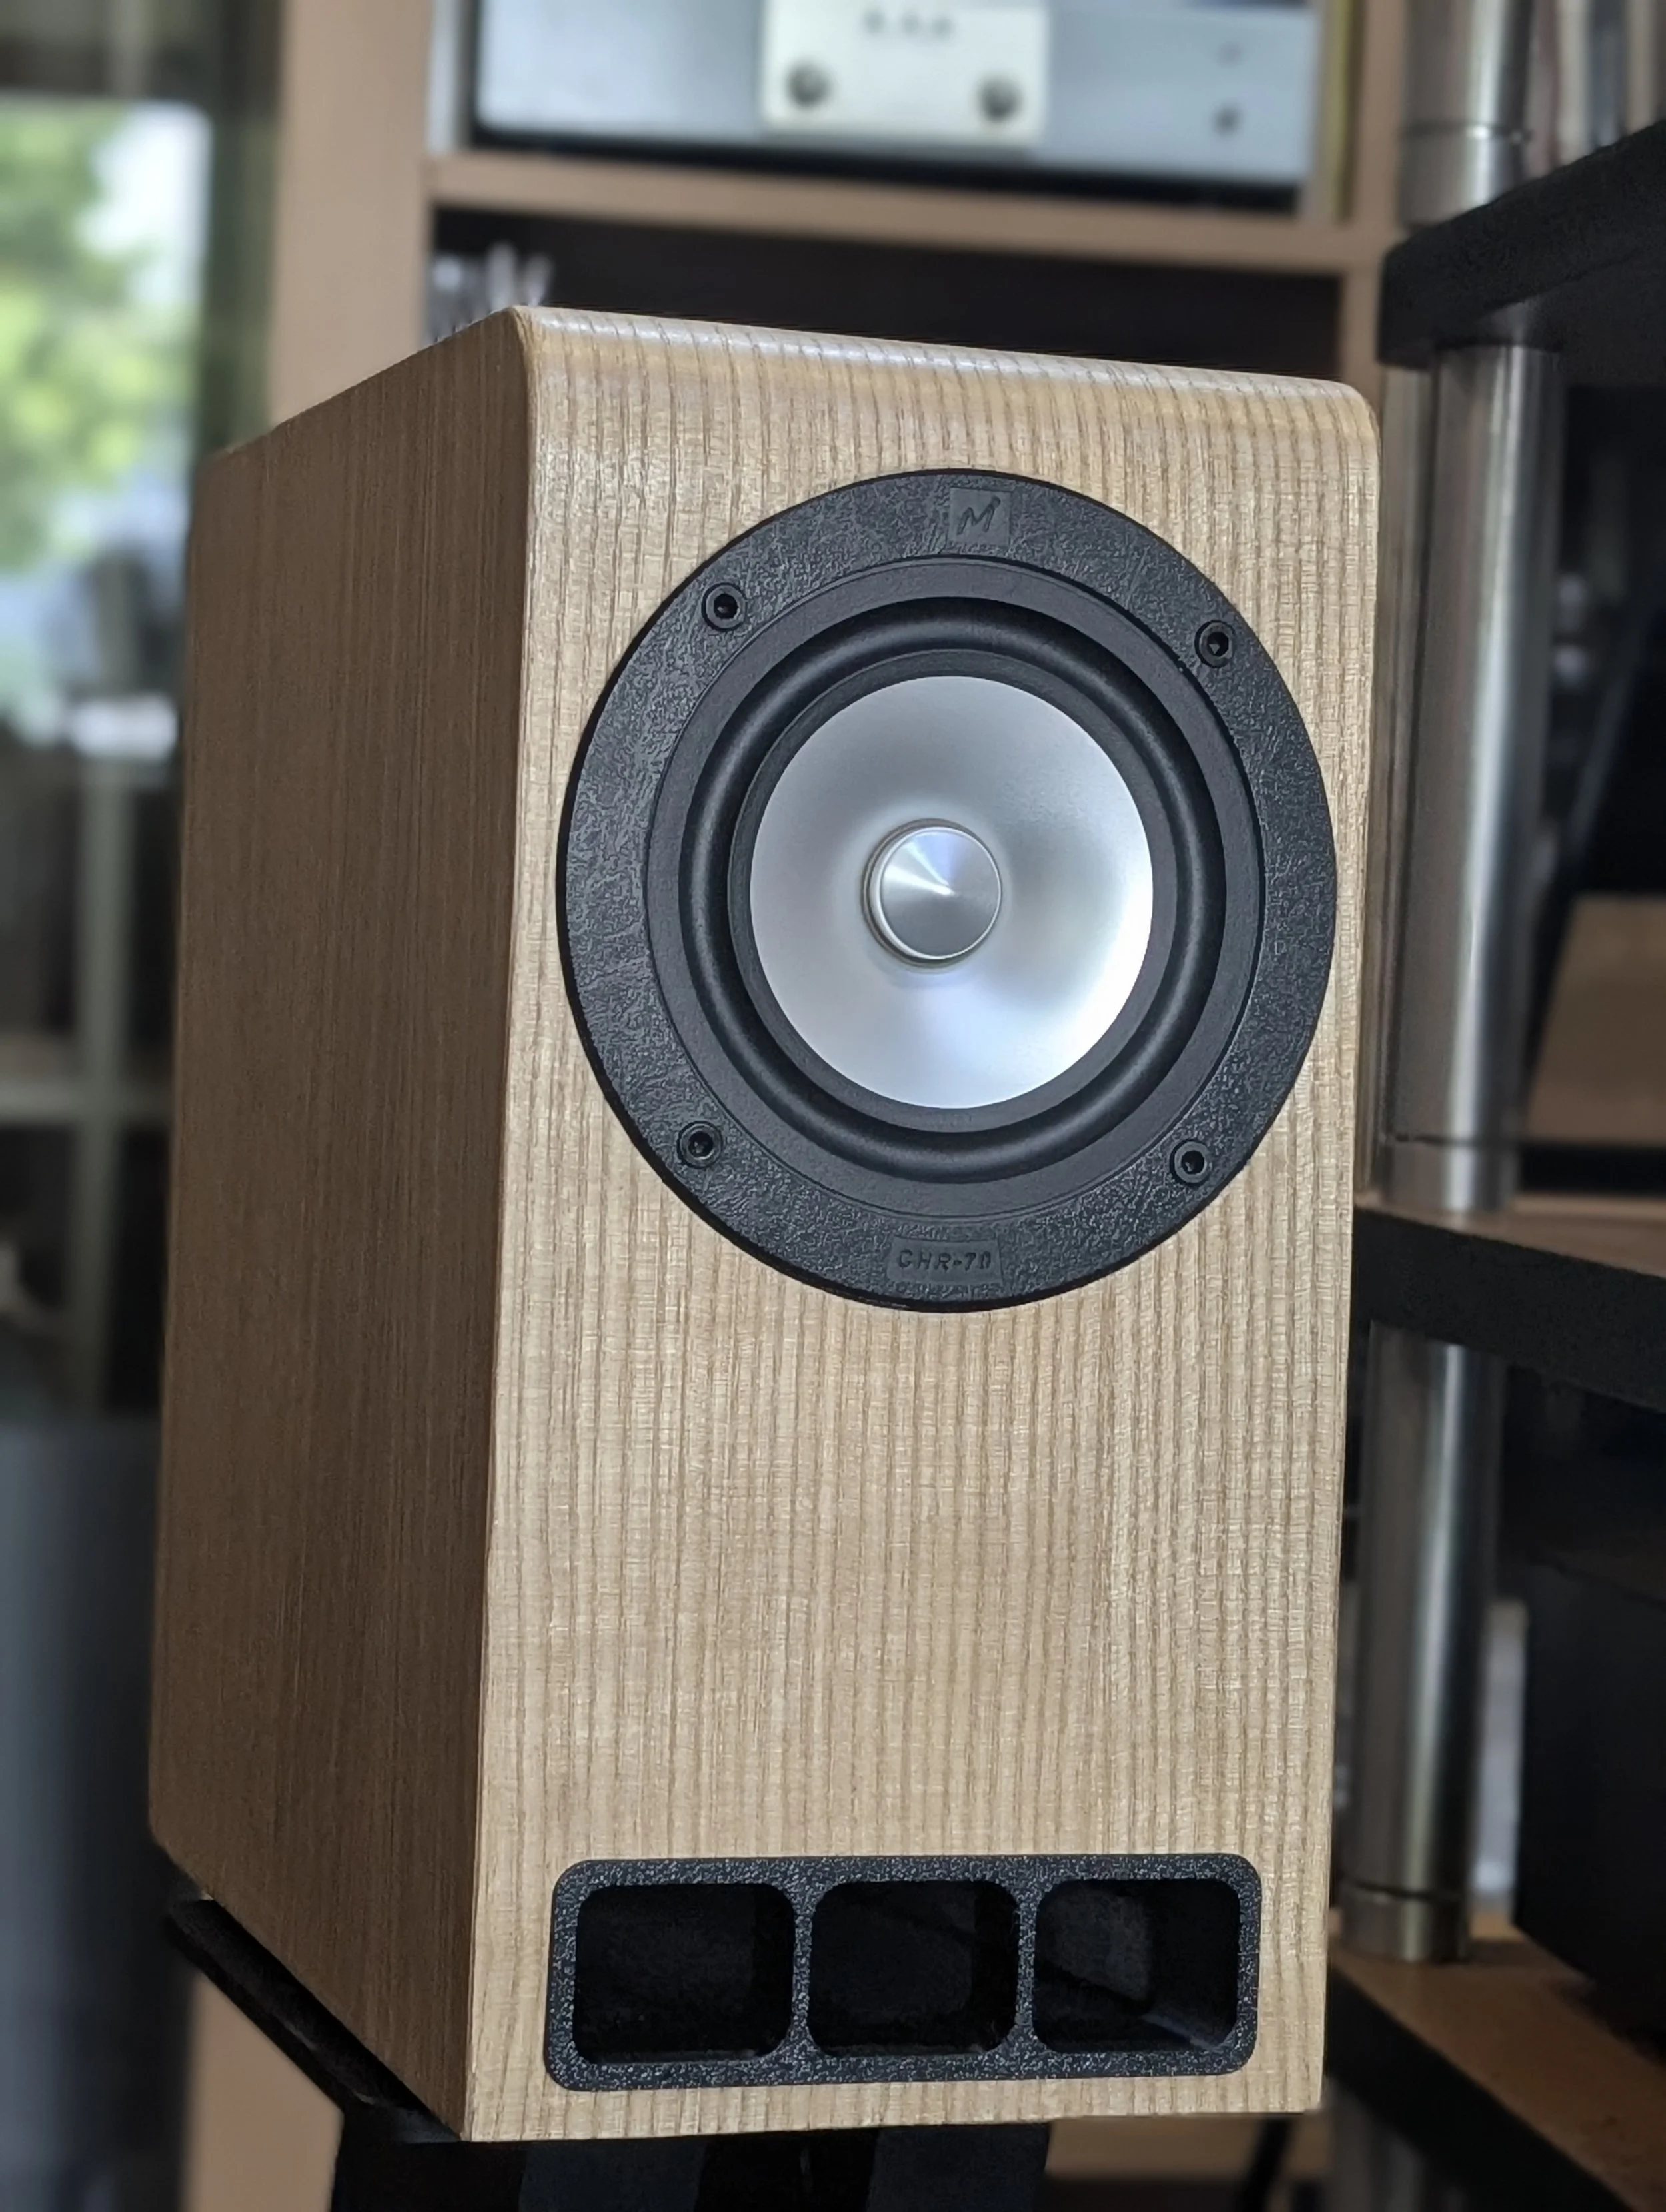
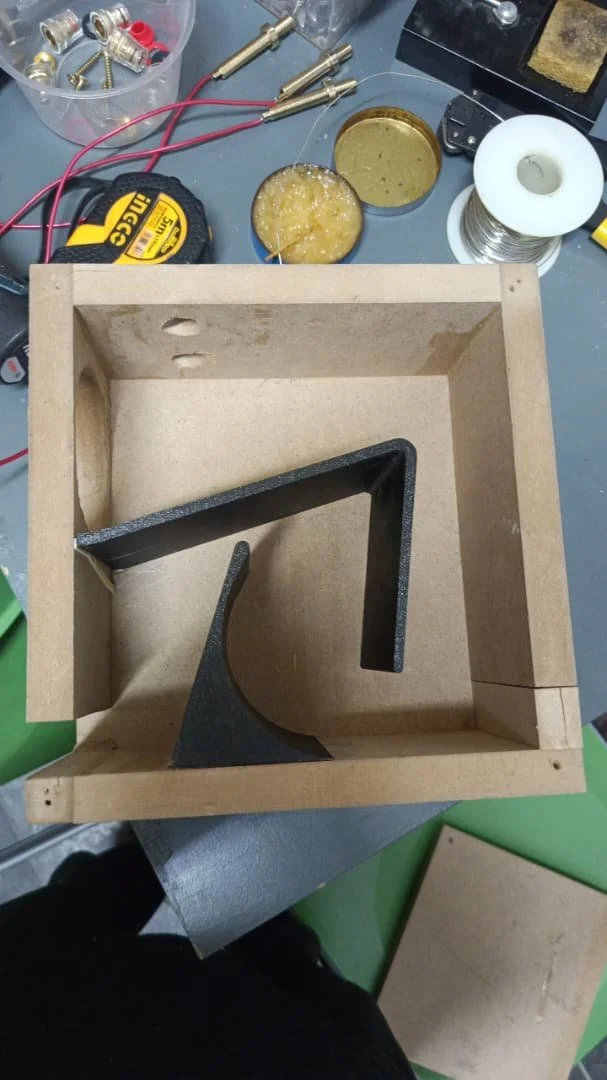
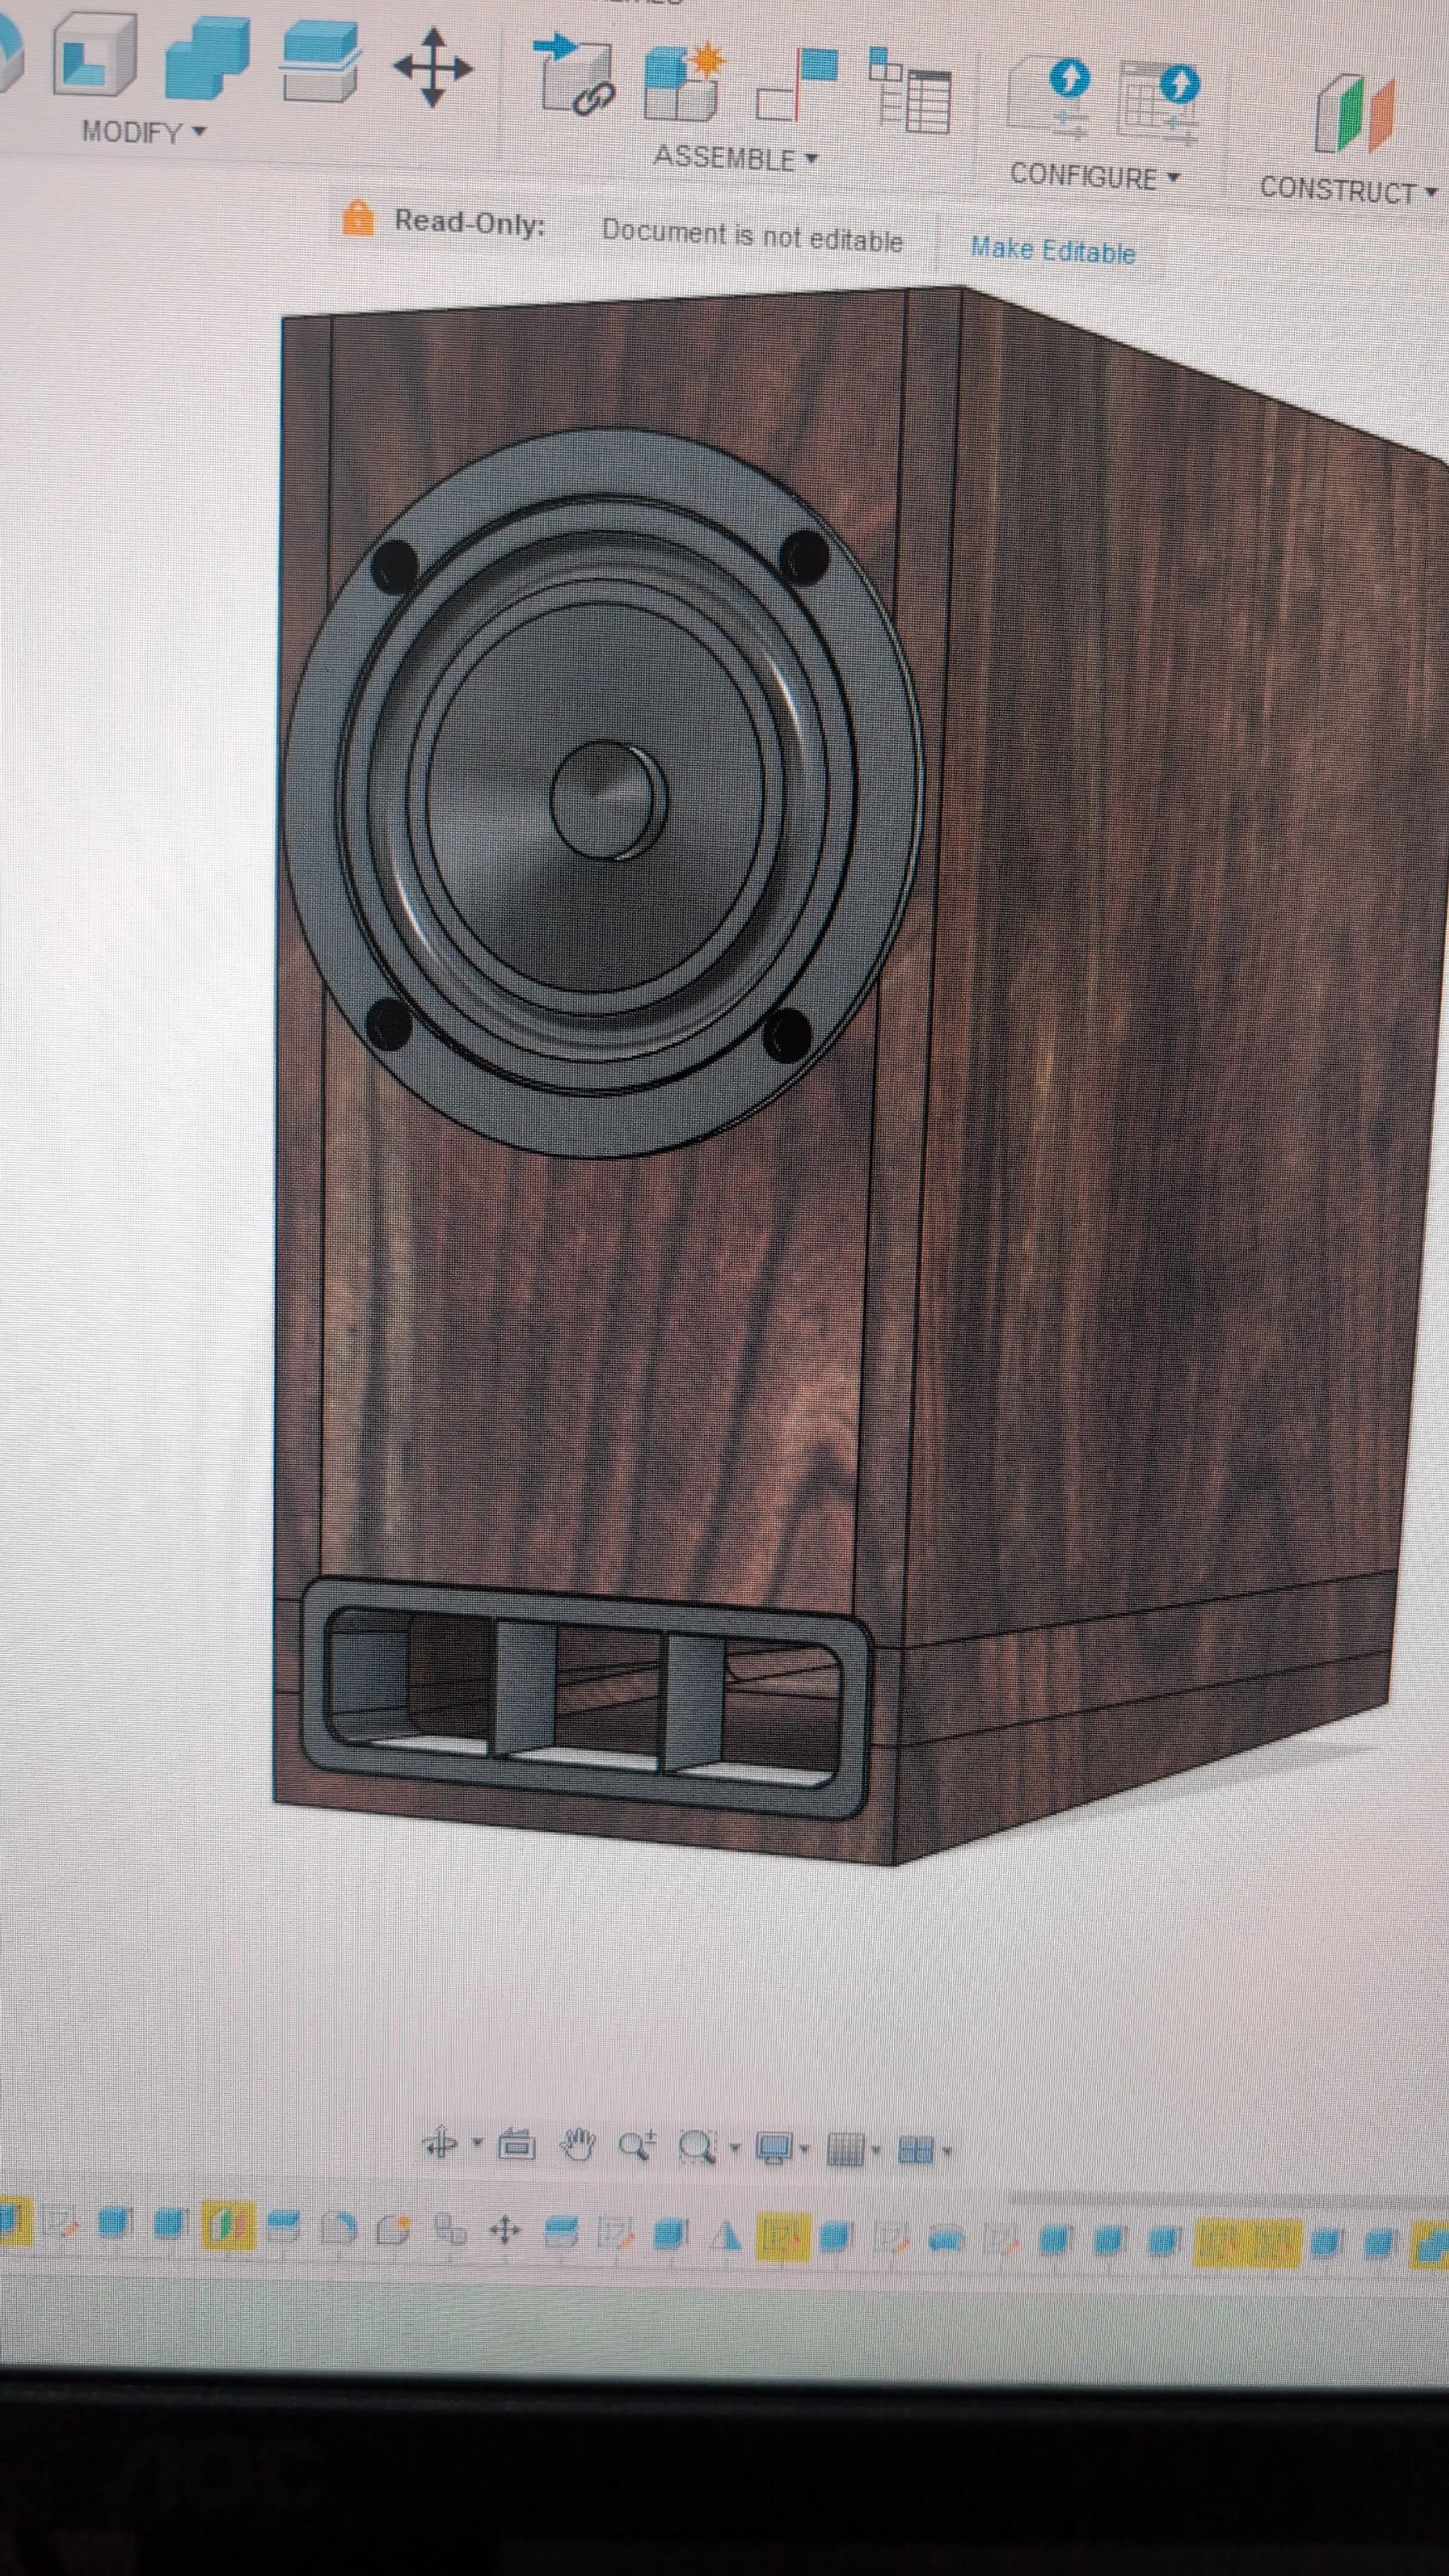
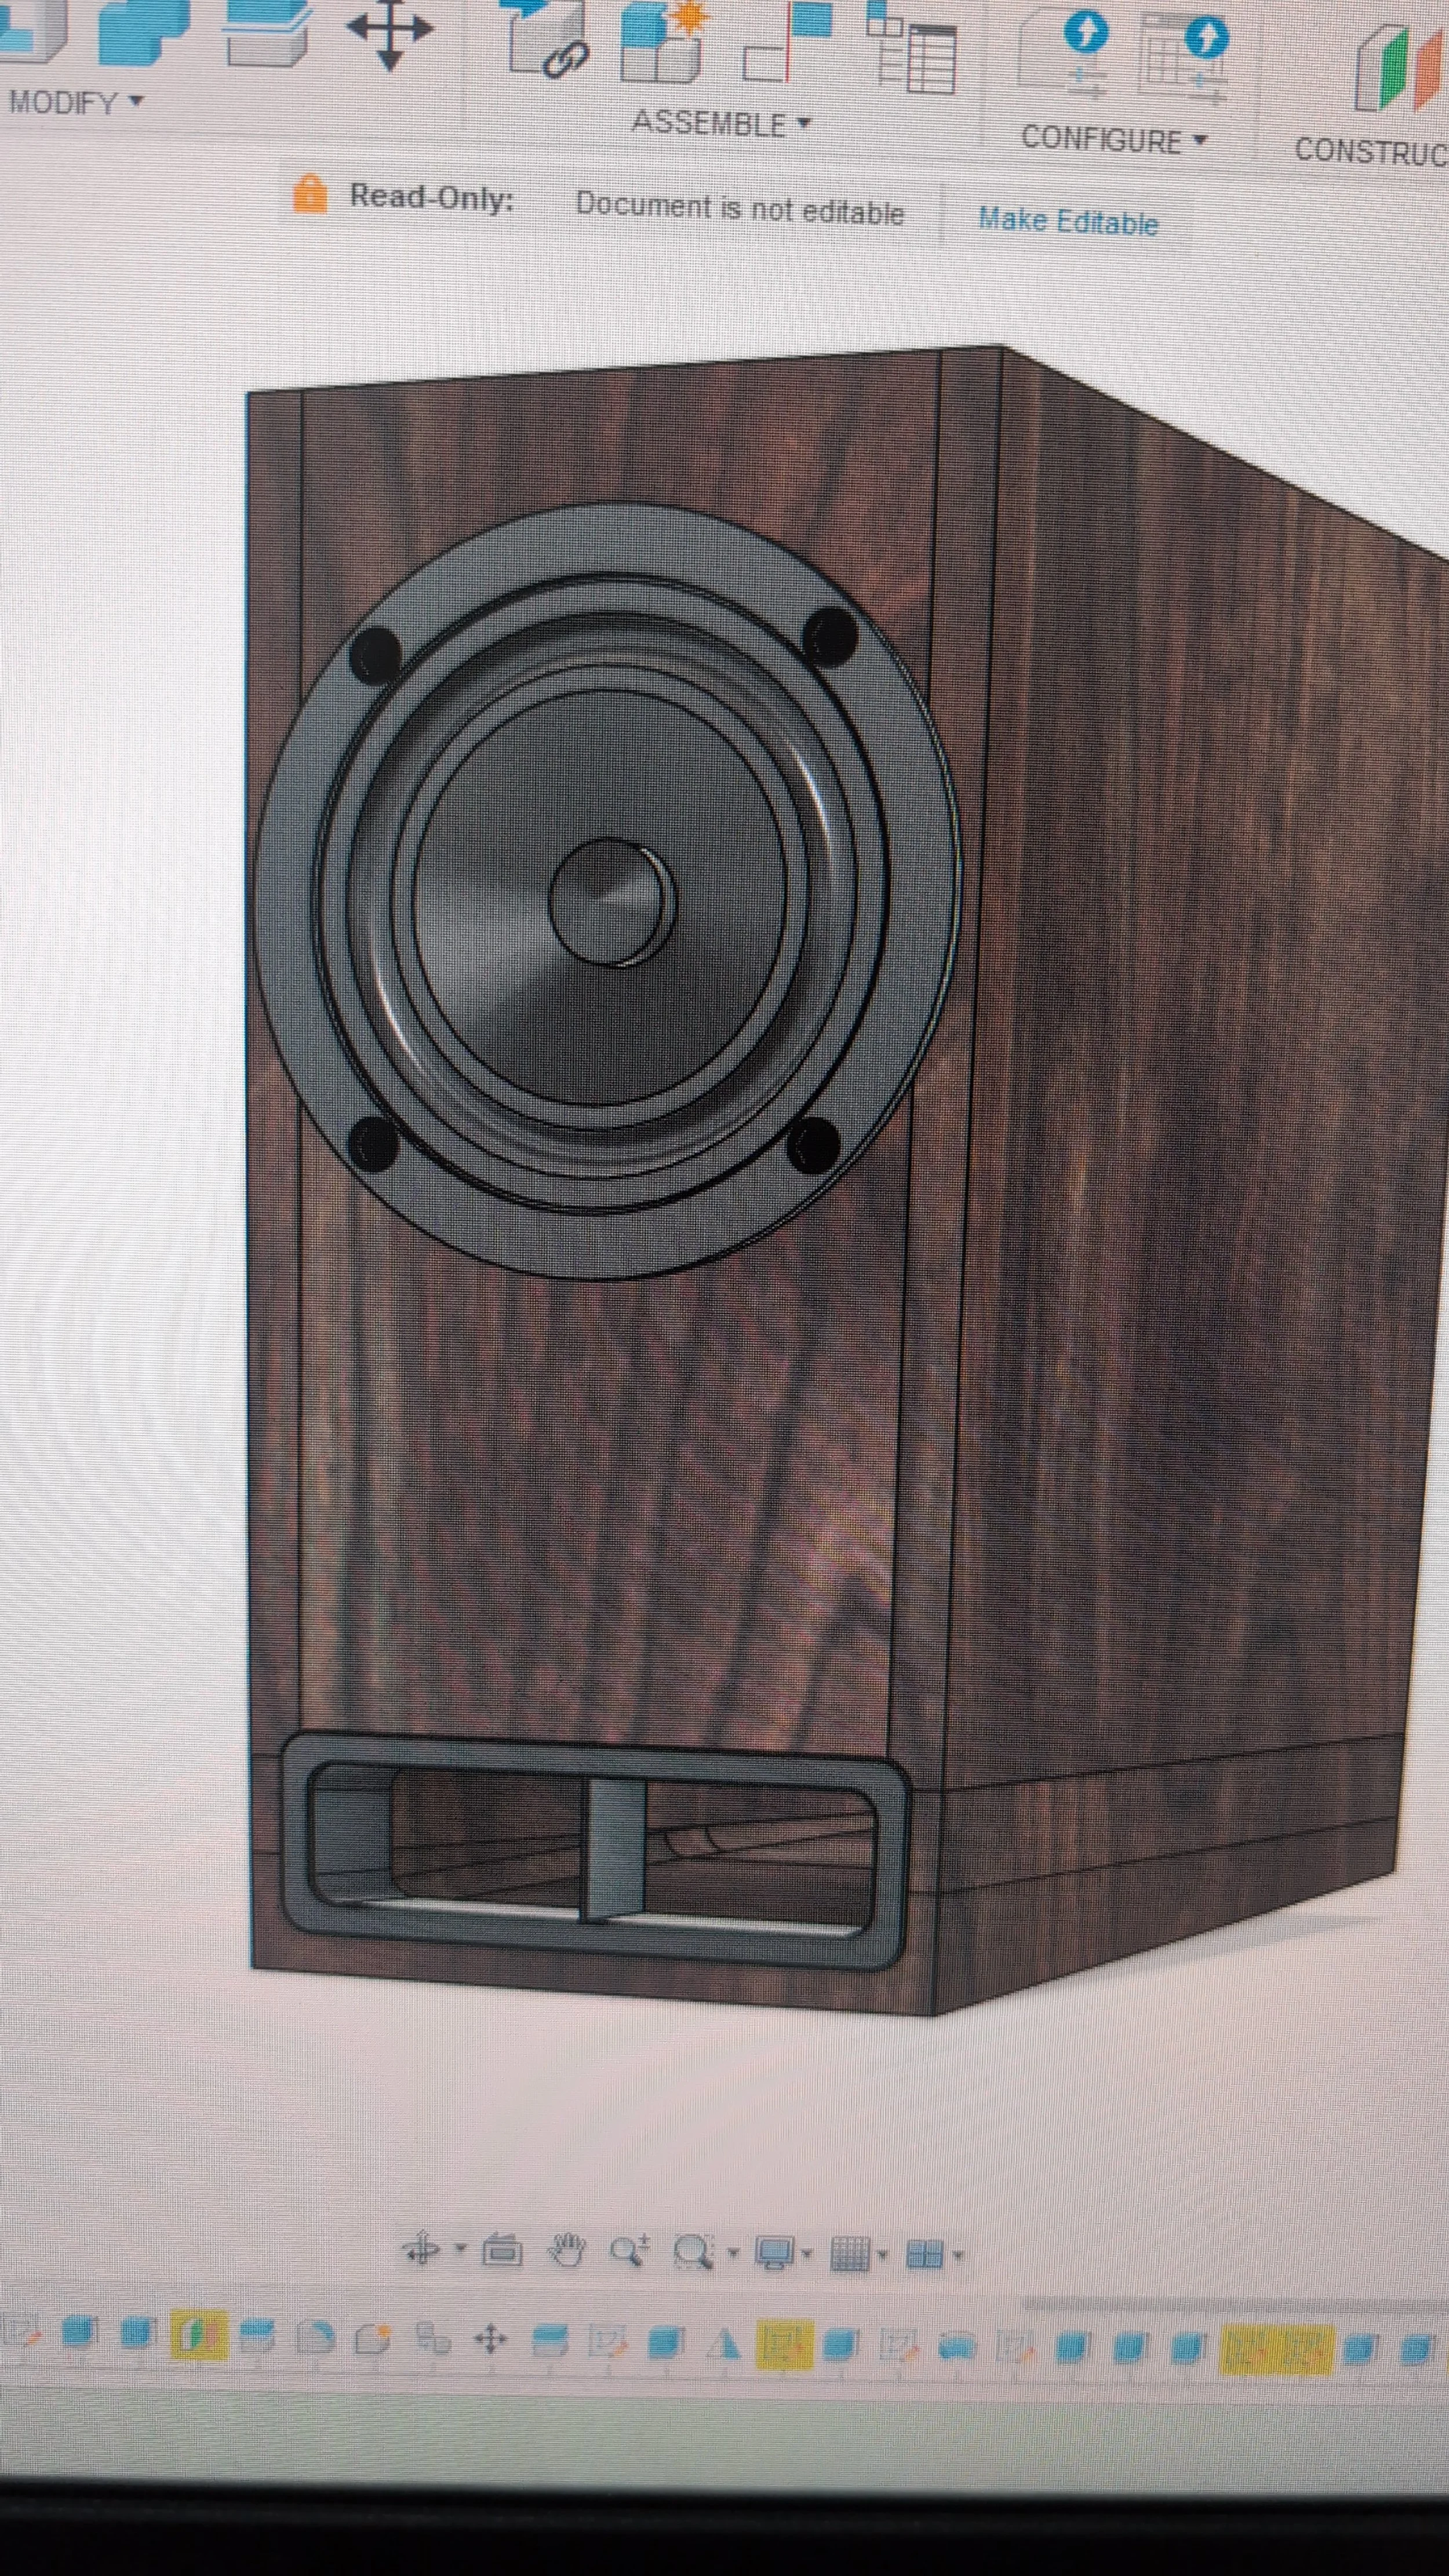
Transmission Line
The company was looking to expand our speaker line with a more affordable, 5-inch driver model, and I led the development on this project. We chose to work with Mark Audio’s MOAP 5 driver, a small but promising component for our cheaper speaker range.
My main task was to experiment with a transmission line in the design. This technique is known for boosting the bass extension of small drivers—a perfect fit for our needs. However, we knew this was a gamble. The MOAP 5's high Q-factor was outside the ideal range for a transmission line design. Despite this, we were inspired by the innovative Ogy from Closer Acoustics and decided to pursue the experiment anyway.


To kick off the design process, my first step was to calculate the ideal length of the transmission line and the necessary volume for optimal performance.
I determined the length using the driver's resonance frequency, a crucial parameter for this type of design. For the volume, I decided to reverse-engineer the manufacturer's recommended diagrams instead of calculating by hand. I didn't want to invest time in learning a new, complex program for a concept that might not even work out in the end. Looking back, it would have been wise to also reverse-engineer the Ogy from Closer Acoustics to better understand the specs of their driver and the path of their transmission line.
After getting those values, I used Fusion 360 to create a design based on the constraints. It was harder than I expected, but the result was incredibly satisfying after many failed attempts.
I experimented with multiple iterations, creating a variety of side, front, and rear ports with both simple and complex transmission lines. I purposely added lots of curves to the internal structure to help sound waves propagate with minimal resistance. This was only possible because we planned to 3D print the cabinet, which gave me the freedom to make the inside as complicated as I wanted while still fitting within our 250mm x 250mm x 250mm print bed.
While using a 3D-printed wall could cause unwanted resonance, for this prototype, we were only testing the sound's flow. I also included internal braces in the print to counteract any potential wall flapping.
I originally only wanted to make a front port, but as I adjusted the transmission line, I discovered I could get a cleaner flow if the exit was at the sides, rear, or bottom. Each configuration offered a unique feel for a desktop speaker. A rear port would bounce bass off the back wall for a more open sound, while a bottom port would shake the table, creating a more tactile feel. Side ports also made for interesting new configurations.
After toying around with the side port idea, we thought it might actually be a good idea as there is another very successful speaker that does the same thing. Namely the Boenicke W5.


After conceptualizing the designs in 3D, I moved on to the hands-on phase of testing these ideas in real life. My first prototype was a simple transmission line. I taped the sides to prevent air leaks and rattling, but the results weren't great—there wasn't much bass, and the speaker cone kept bottoming out against the stopper.
Next, we tried the 3D-printed transmission line. With a more complex internal structure, the bass was better, but the low 15% infill made the sound feel hollow. This version also had the same bottoming-out issue.
As a side note, we discovered we couldn't find a way to quickly connect the binding posts with the transmission line in place. This led us to put the posts on top of the speaker, a compromise that earned the project its codename: Bunny.
Ultimately, my boss made the call to stop this side exploration and move on to more feasible port designs that better suited the driver's parameters. While the experiment didn't result in a final product, I would say the experience was invaluable. The lessons I learned about setting constraints in Fusion 360 and designing a transmission line from the ground up were priceless.


Port Design
After that chapter, our goal was to try as many different configurations as possible and pick the best-sounding one. This is where the limitations of simulation versus hands-on work become clear. While a simulation can quickly predict how a box would change a speaker's sound, it can't capture the real-world feel. We found that a hybrid approach—using simulations for speed and physical prototypes for validation—was the most effective way forward.
To allow for fast configuration, the next prototype speaker cabinet I made took this into account. All the plates were designed to be swappable and cut to precise sizes, with no glue and fasteners all at calculated positions. This allowed us to quickly assemble, test, and reconfigure the cabinet in a fraction of the time.
The conclusions from these tests were consistent: the designs weren't producing enough bass, and the drivers kept bottoming out. With these results in hand, our next step was to explore a bass reflex design.


Unfortunately, I don’t have a lot of photos from this process, but we tried bass reflex configurations with back, front, and bottom ports. These gave us the most promising sound we had heard so far—they delivered the "oomph" we were looking for. However, a persistent problem remained: the speaker cone kept hitting the stopper at louder volumes.
This led to a major decision: we made the call to upgrade to a larger 7-inch driver. While this went against our initial goal of creating a 5-inch cabinet, we knew a speaker that doesn't sound good won't sell. A bigger driver was also a good idea for another reason: the new driver's width was almost an exact match for the box, which would make the internal airflow more laminar and easier to calculate.
Of the three port locations we tested, the bottom port delivered the best sound. Unfortunately, this meant we would need an extra part—a stand—to prop the speaker up so the sound could escape. It was unreasonable to expect a customer to put something under their speaker to make it work.
My “Hidden Port“ Solution
I thought of a pretty genius way to solve this problem without needing a separate stand. I simply made the bottom of the speaker a normal base and shifted the whole port plate up, creating a port at the front. The result was a hidden bottom port cleverly disguised as a front port. Not only did it look awesome, but it also sounded awesome. This became our final design.
We didn't just settle on the first good idea we found. We had the freedom to continue exploring and return to our earlier design. But as we kept switching out the plates—unscrewing and screwing parts back on—the cabinet started to fall apart. Sounds began escaping through the cracks. We found an easy fix by stuffing the cracks with Blu-Tack, and it worked wonders, proving a quick, real-world hack can be just as effective as a complex solution.
We also went back to exploring different horn configurations for the bottom. We decided against the hidden port idea because we didn't want to sacrifice the internal air volume of the speaker, which is crucial for sound quality. Instead, we moved the bass reflex plate back to the bottom and designed horns underneath it to channel the sound.
This new path, however, led to a classic case of tunnel vision. We became so focused on the horn idea that we started thinking of the bottom as a completely separate part from the speaker itself. While there is merit in this—it makes the speaker easier to service if the bottom breaks—it's highly unlikely that part would be damaged. We thought a 3D-printed bottom would allow for interesting horn configurations, but it came with the same compromises as before, like potential resonance. We learned that even a promising new direction requires a reality check to ensure it's the right solution.


Trying to achieve better sound
Every speaker cabinet needs some internal padding to absorb unwanted frequencies and tame the high end. For our speaker, we hypothesized that by cutting a specific shape into the foam—with a series of peaks—we could absorb more sound with less material. However, the foam we used, Superlon, was incredibly difficult to cut. It stuck and dragged like aluminum, making it a tricky material to work with.
To solve this, I tried a simple, low-cost solution: punching the shapes out. I found an old, perfect-sized ABS plastic cylinder in our 3D print bin and, with a few hits from a hammer, it punched through all eight holes. I fully expected it to shatter, but it held up, though it was a bit smashed and blunt by the end. This test was a great demonstration of the strength of 3D-printed ABS.
After that initial success, I tried 3D printing a custom die in the exact shape of the foam we needed. Even with a tapered tip, the design failed. It would either bend at the tip, or the layers would splice in half due to weak bonding. This experiment proved that a custom punch die made from plastic just wasn't strong enough. In the end, we learned that this intricate shape was impossible to manufacture without a proper metal die.
Aesthetic Design
Since I’m more skilled in digital design than in physical prototyping, I used my best skill to refine the cabinet's aesthetics. I spent time making different configurations of the box, combining the best and worst ideas to envision the perfect sound and, more importantly, the best look.
I originally wanted to keep the iconic fillets that were a signature of the Aime speaker line. However, my ideas for them proved difficult to manufacture, especially with how close the driver was to the edge. So, I literally started to design outside the box, focusing on a new approach.
Inspired by the Sonus Faber Extrema, I began creating conical and jet-like shapes for the exterior. I wanted to add some visual flair to a cabinet that would be 3D printed anyway. While some of the designs looked cool, they made the speaker seem very short. This led me to lean into the idea of a shorter, more stylized speaker.
Within that same vein, I experimented with interesting port designs that leaned into the jet theme. While I knew they might compromise the sound, they looked awesome and allowed me to explore a more modern aesthetic.
I also had a very interesting idea to create a concept speaker with bunny ears and legs as part of the design. I decided not to fully pursue this idea at the time, as I felt a concept like that should be reserved for a time when I had more freedom to experiment.


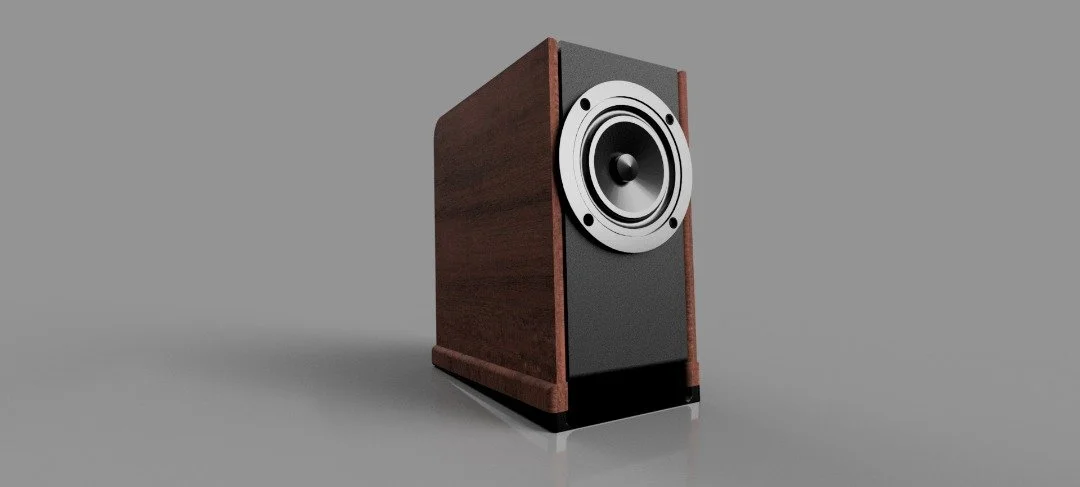
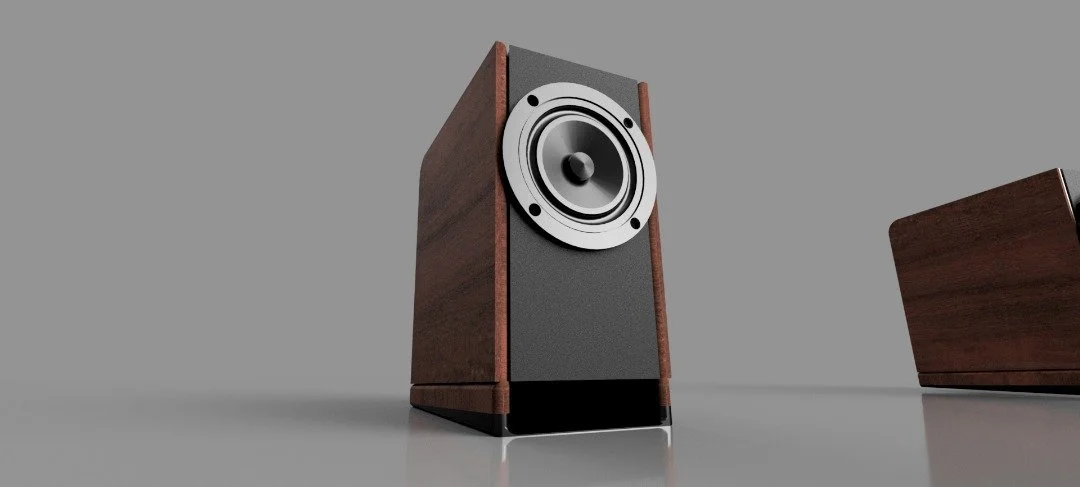


While I liked the visual appeal of the jet-themed design, I didn’t think it aligned with the Aime brand’s core philosophy. My goal was to create something that looked clean, classic, and elegant, so I went back to a very early idea: an inner fillet on the front face of the speaker. The moment I implemented it, I was immediately sold.
I began exploring different color palettes, seeing how far I could take the idea while still keeping it consistent with the brand. While I was designing, I made sure to always keep the construction in mind. I quickly realized that veneering an inner fillet would be incredibly difficult unless the cabinet was milled from a solid block of wood. The internal black would also have to be spray-painted after construction, adding a layer of complexity.
This led me to reconsider the "one-piece" wall idea from the earlier prototypes. By using renders of different configurations, I could choose a construction method that was both visually stunning and manufacturable. After these explorations, I was finally able to select a final design.
Making
Collaboration and Compromise
With a clear recipe in hand, I collaborated with my senior colleague to choose the final design from my renders and create the engineering drawings. This is where a classic collaboration challenge arose: I had personally experienced all the prototypes and their flaws, but my senior colleague hadn't. We started working on the final speaker in the workshop, but he kept meticulously measuring the cabinet by hand and refused to look at the engineering drawing.
For me, it felt like we were going in circles. I had already worked through these problems in the prototyping phase, but he was experiencing them for the first time, meticulously trying to perfect everything by hand. I realized this was an error on both our parts. I should have understood his working style and brought him into the prototyping phase from the start.
The Final Challenge
Despite the initial friction, this phase had immense benefits. It was my fifth time building this type of box, but it was his first, and I was still learning a lot from him. The most difficult challenge was getting the bottom of the speaker perfectly square. Since the final design required the side panels to cover the bottom, everything had to be perfectly flat and square to avoid any rattling. My colleague was a master of this, constantly routing the sides until they were perfect.
It was also fascinating to see how he achieved the signature Aime look. While I had struggled with intricate designs in Fusion 360, he did it in a breeze by simply applying a fillet to all the horizontal corners. With one simple, elegant step, he perfectly captured the company's aesthetic.


For the final finishing touches—the veneering, coloring, and 3D-printed ports—we took our time. We believed that for such a small product, any imperfection would be easily spotted, so we worked with extra care. This stage of the project was incredibly therapeutic. After three months of design and prototyping, we were finally bringing the speaker to life.
A notable challenge during finishing was the veneering. With three curves on each speaker, we had to be meticulous. We actually had to scrap our first veneering attempt because the material warped and slid out of place. After that lesson, we proceeded carefully and successfully completed the project.
We also had to deal with imperfections from the woodworking and screw holes that could have damaged the veneer. We used putty to cover these up—a surprisingly fun exercise in delicate, artistic work on such a small product. Patching the veneer on the broken corners was also a fine art. The attention to detail required during this stage showed me that the final finish is where a product truly shines.
The Finishing Touches: From Prototyping to Production
To finally finish the details of the speaker, we focused on the veneering, coloring of certain parts, and 3D printing of the ports. We knew that for such a small product, any imperfection would be easily spotted, so we worked with extra care. This finishing stage was a therapeutic experience after three months of intense development.
The veneering, in particular, was a challenge. With three curves on each speaker, we had to be meticulous. Our first attempt failed as the veneer warped and slid out of place. After that, we learned our lesson and proceeded carefully to complete the product. We also had to use putty to cover up imperfections in the woodworking and screw holes, which proved to be a surprisingly fun, artistic exercise in fine detail work.
Final Explorations
We also experimented with 3D printing a custom grill for the speaker. While the final pattern didn't look great, it was a good proof of concept that the process was viable with a better vector design.
Similarly, we wanted to remake the backplate because the stock part was too large. As I designed the new plate, I took inspiration from the old one and included the original branding. The final result, with a double-filament print, looked awesome. This taught me a valuable lesson in scale: by positioning my design on-screen to match real-world size, I could get a better sense of how it would look and fit. While a colleague later suggested a different design, the exercise was invaluable. It was another step in a journey of continuous learning and improvement.


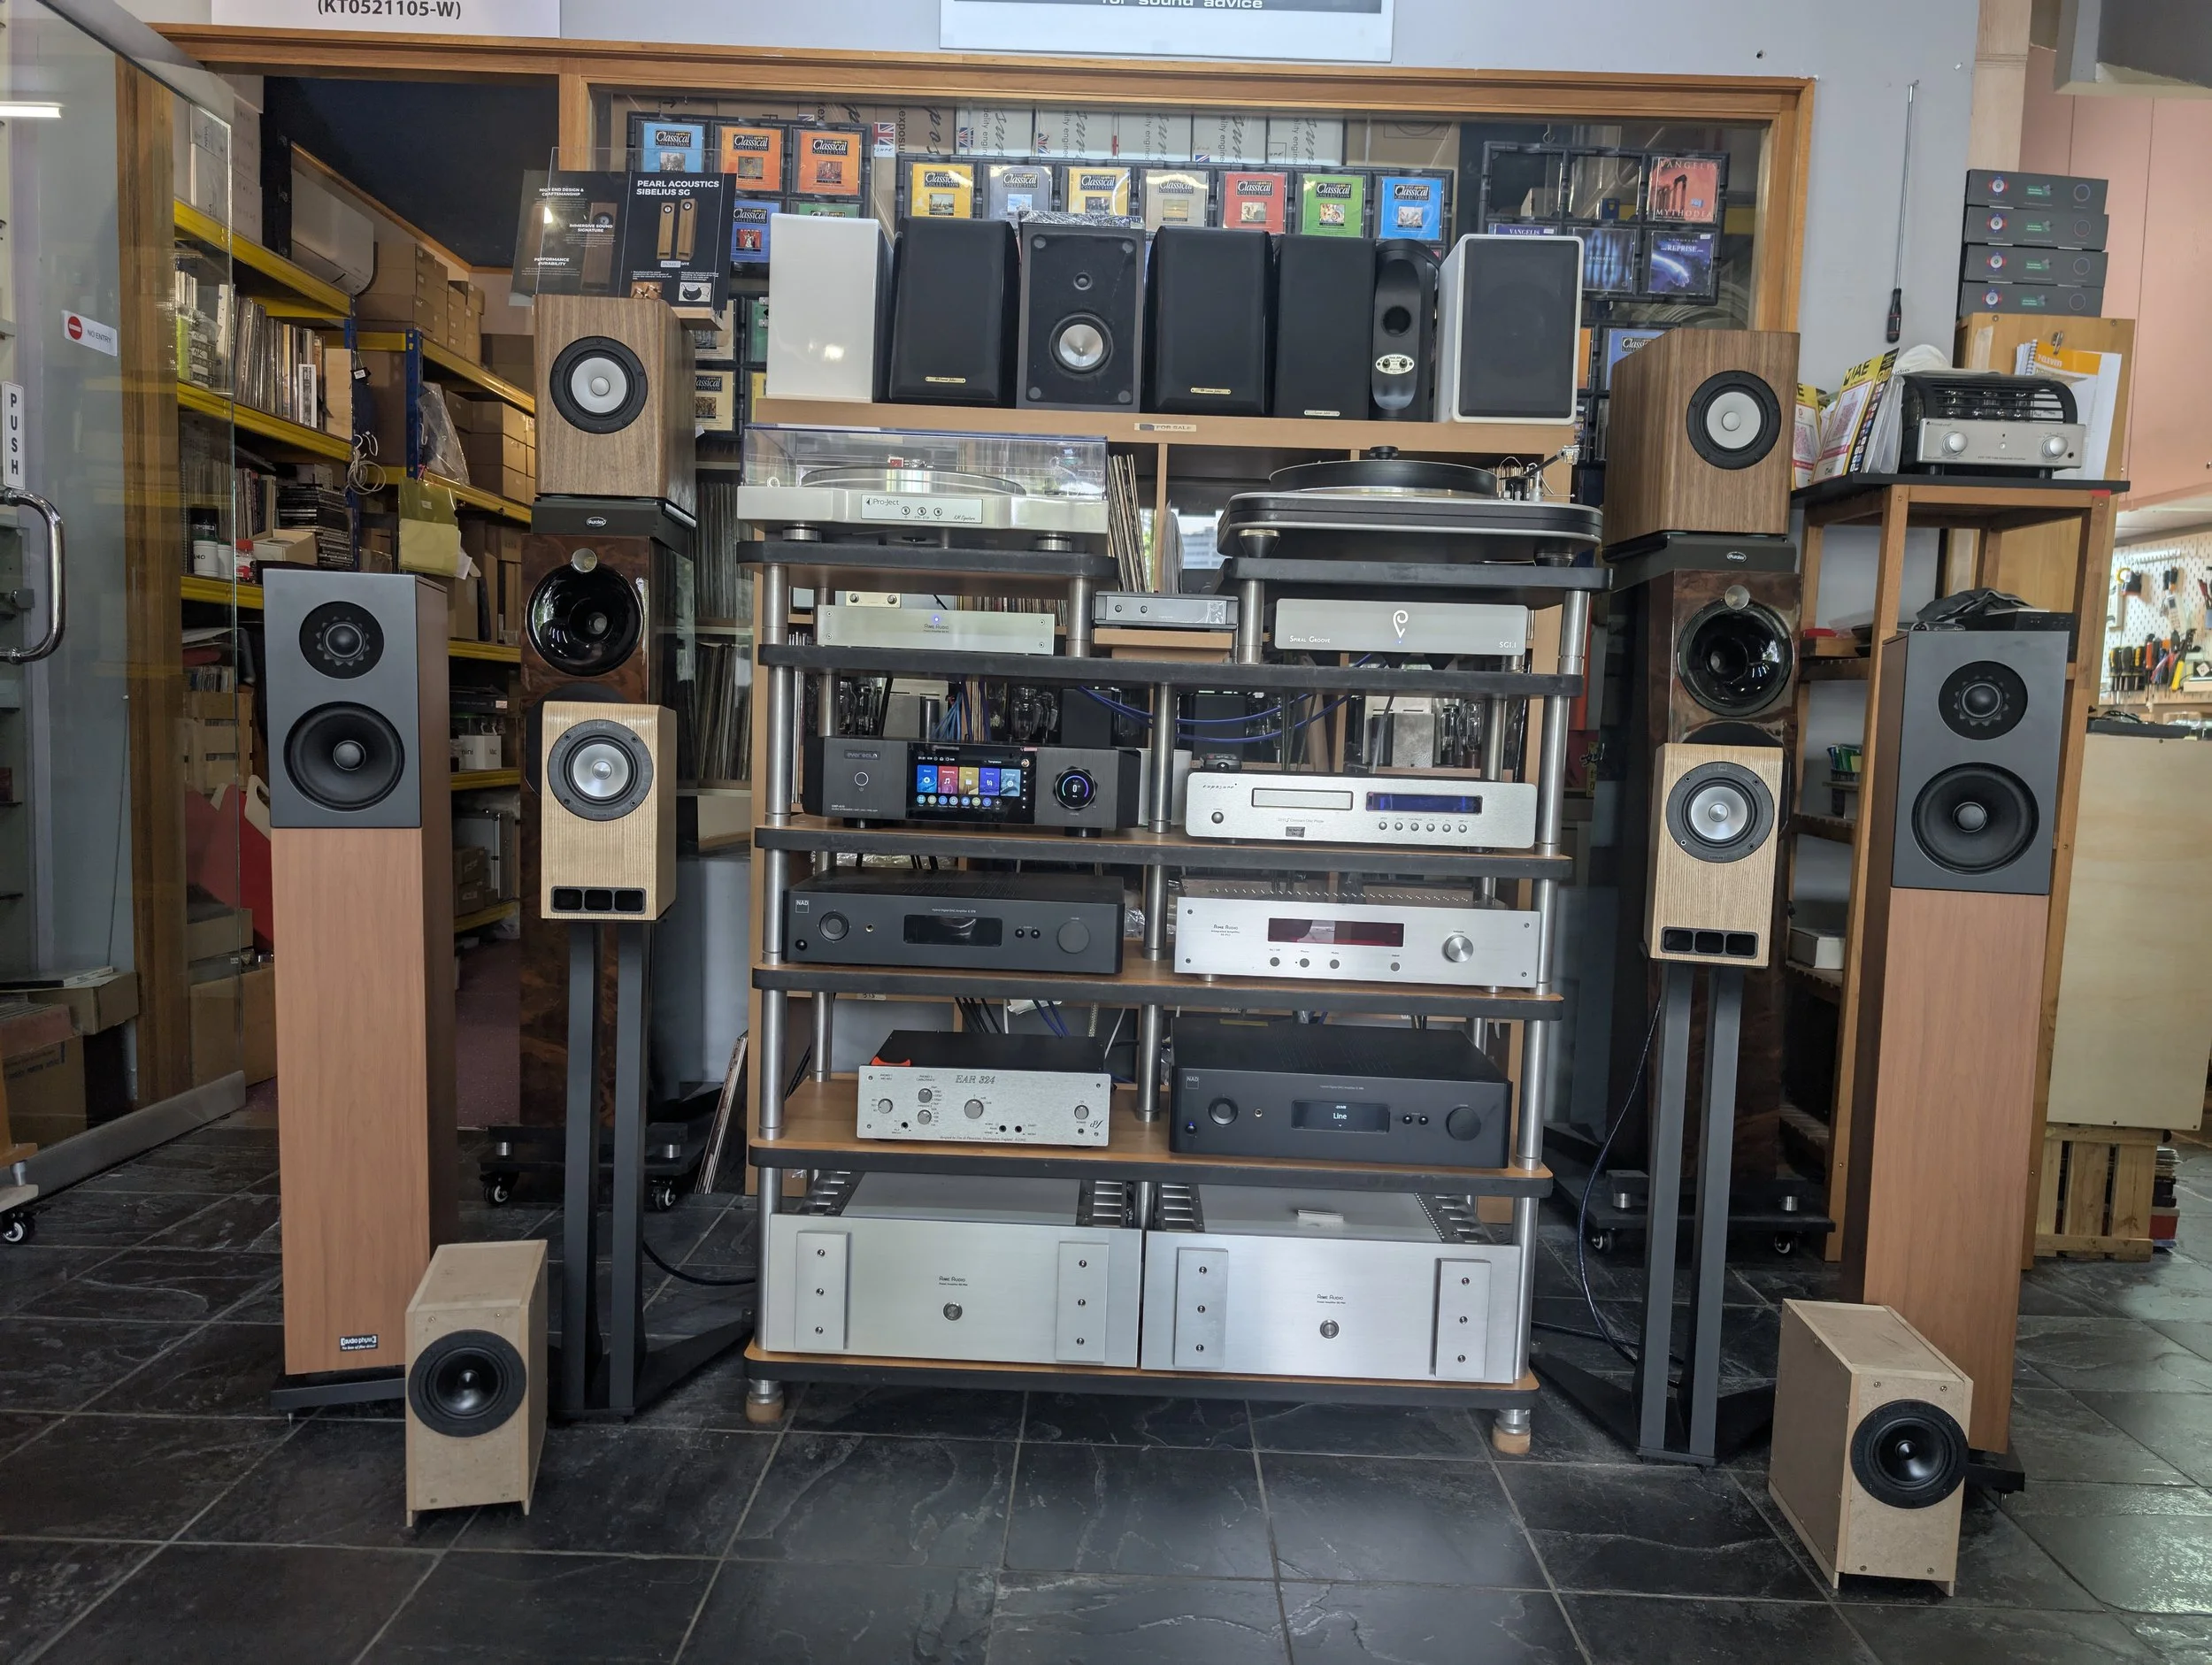
Verdict
The speaker sounded awesome, with amazing staging. You could really tell how the left pans to the right even with such a small speaker. Which is a huge plus when you are in small spaces as it helps to make your space feels big. The bass though wasn’t big, it does play deep, only if you listens to it softly. The extension of the bass with this speaker is amazing. But you can’t expect a floor standard sound from such a small cabinet, maybe you could, but this speaker ain’t it. It has its very unique timbre, a clear high and a powerful mid. Which is perfect for listening to pop and orchestral music, aligning with our desktop users who would be mainly using this for studying periods. Overall, I think I have learned a lot during this process, though there are things I would do differently in hindsight, but I am glad I did what I did in order to land where I am today.