Leather Refurbishment
Refurbishing leather is one of the hardest look to achieve, as it isn’t “flat“ in that it would need to wrap when touched, whilst still need to maintain that “gloss“ look. The best option would be re-pull the leather. However, that is not always an option when budget and skills isn’t on the table. Hence, we experimented with something else.
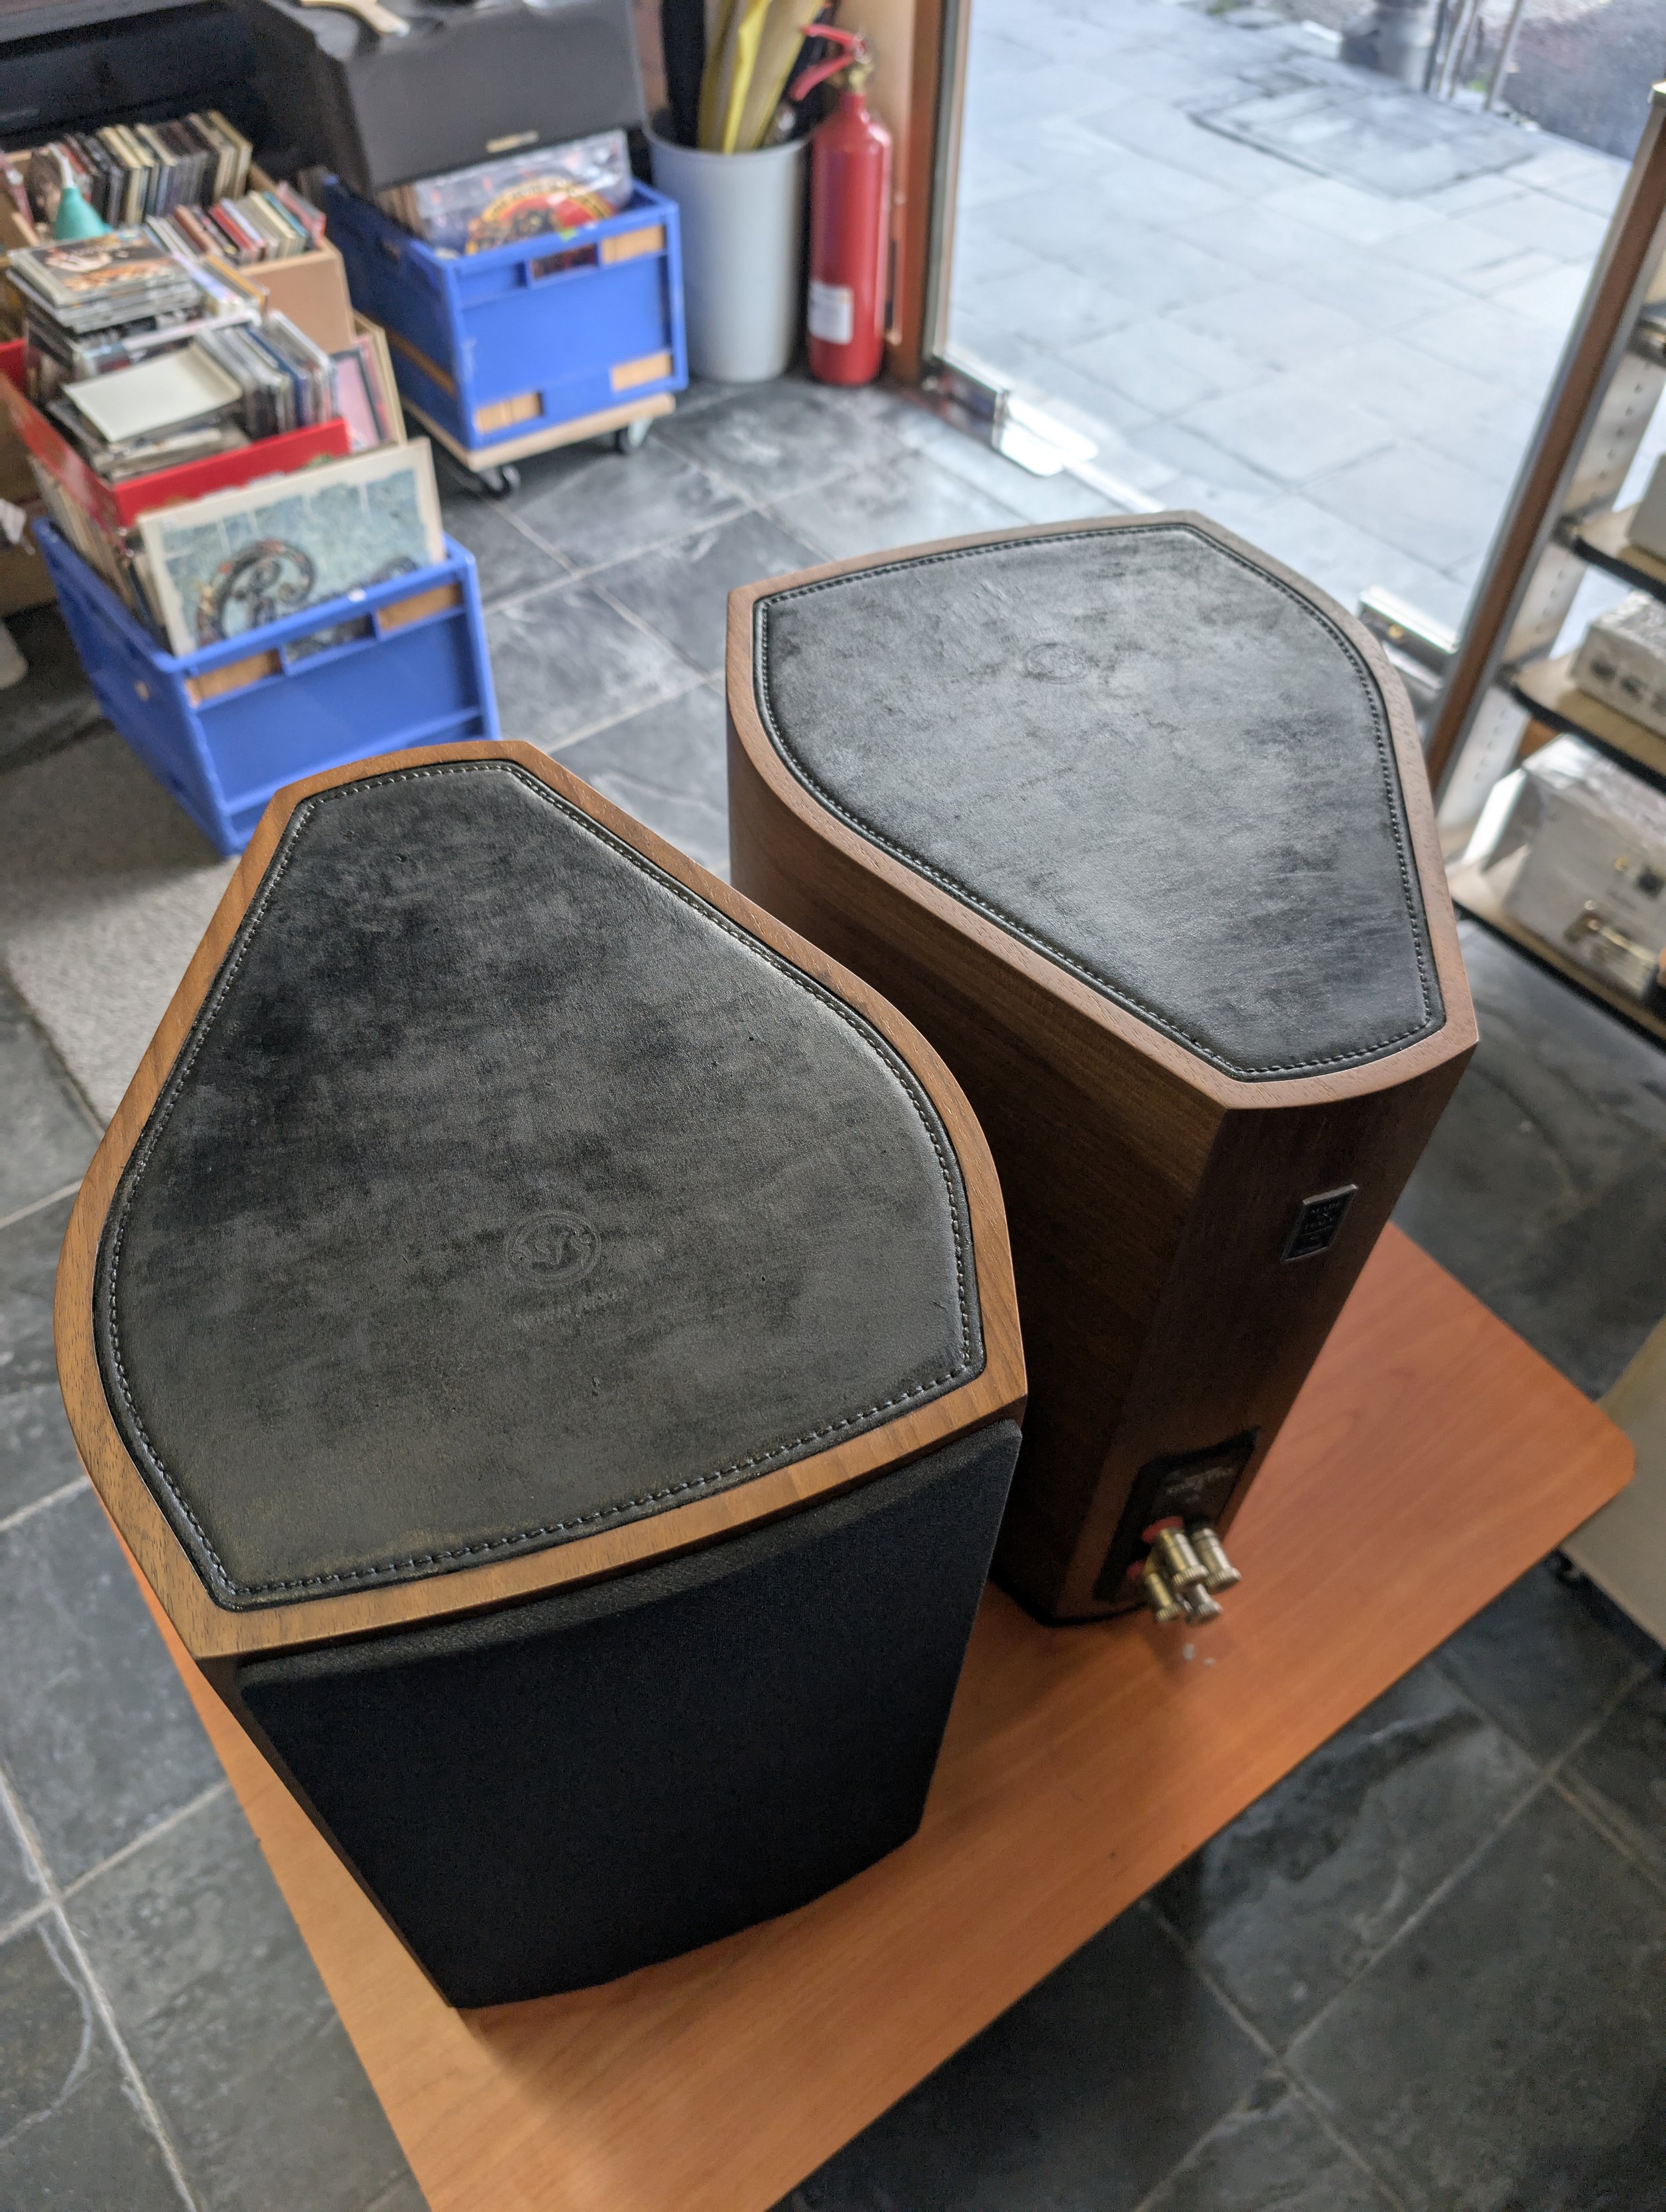
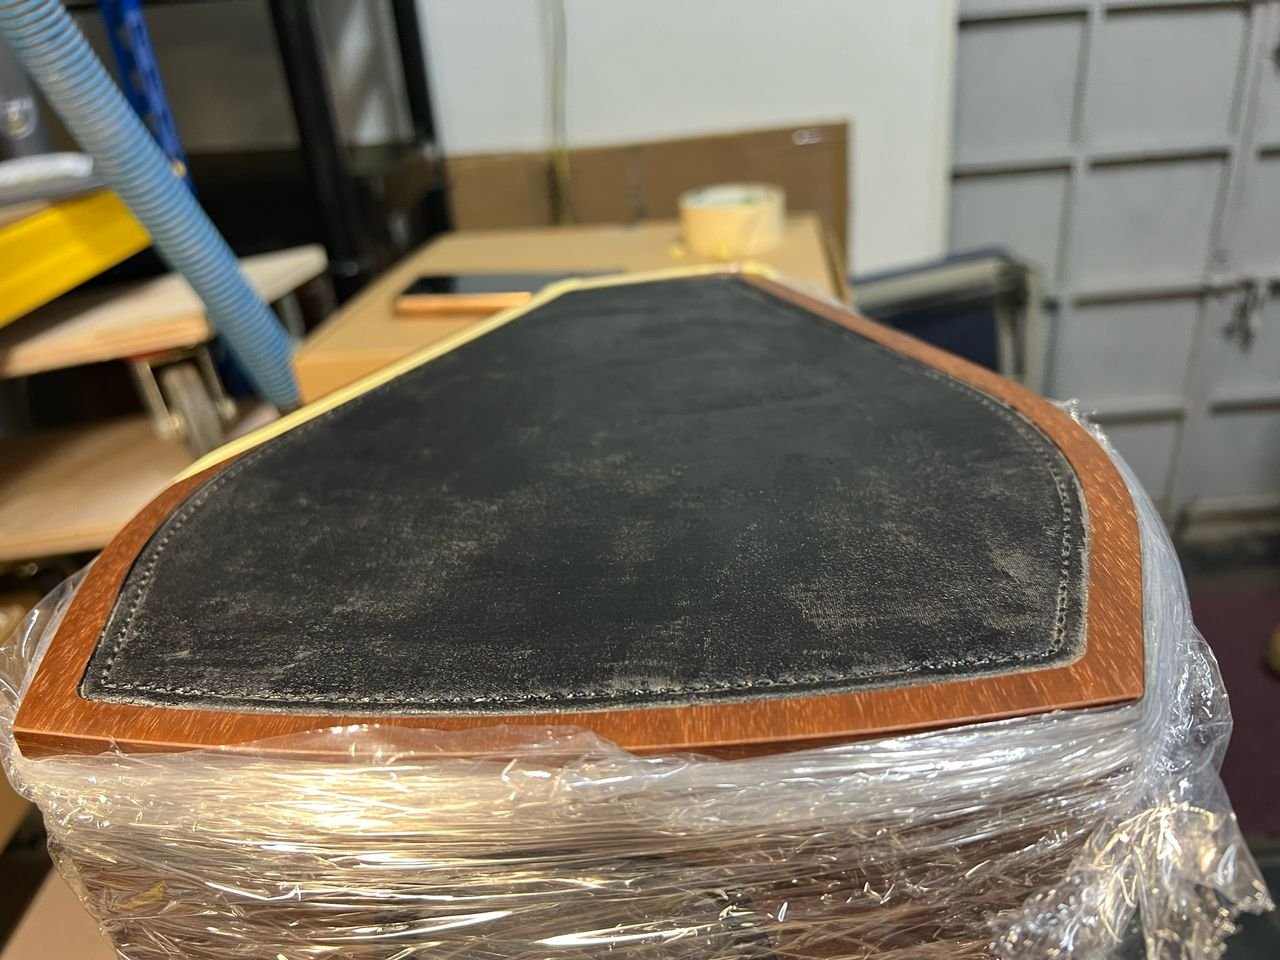
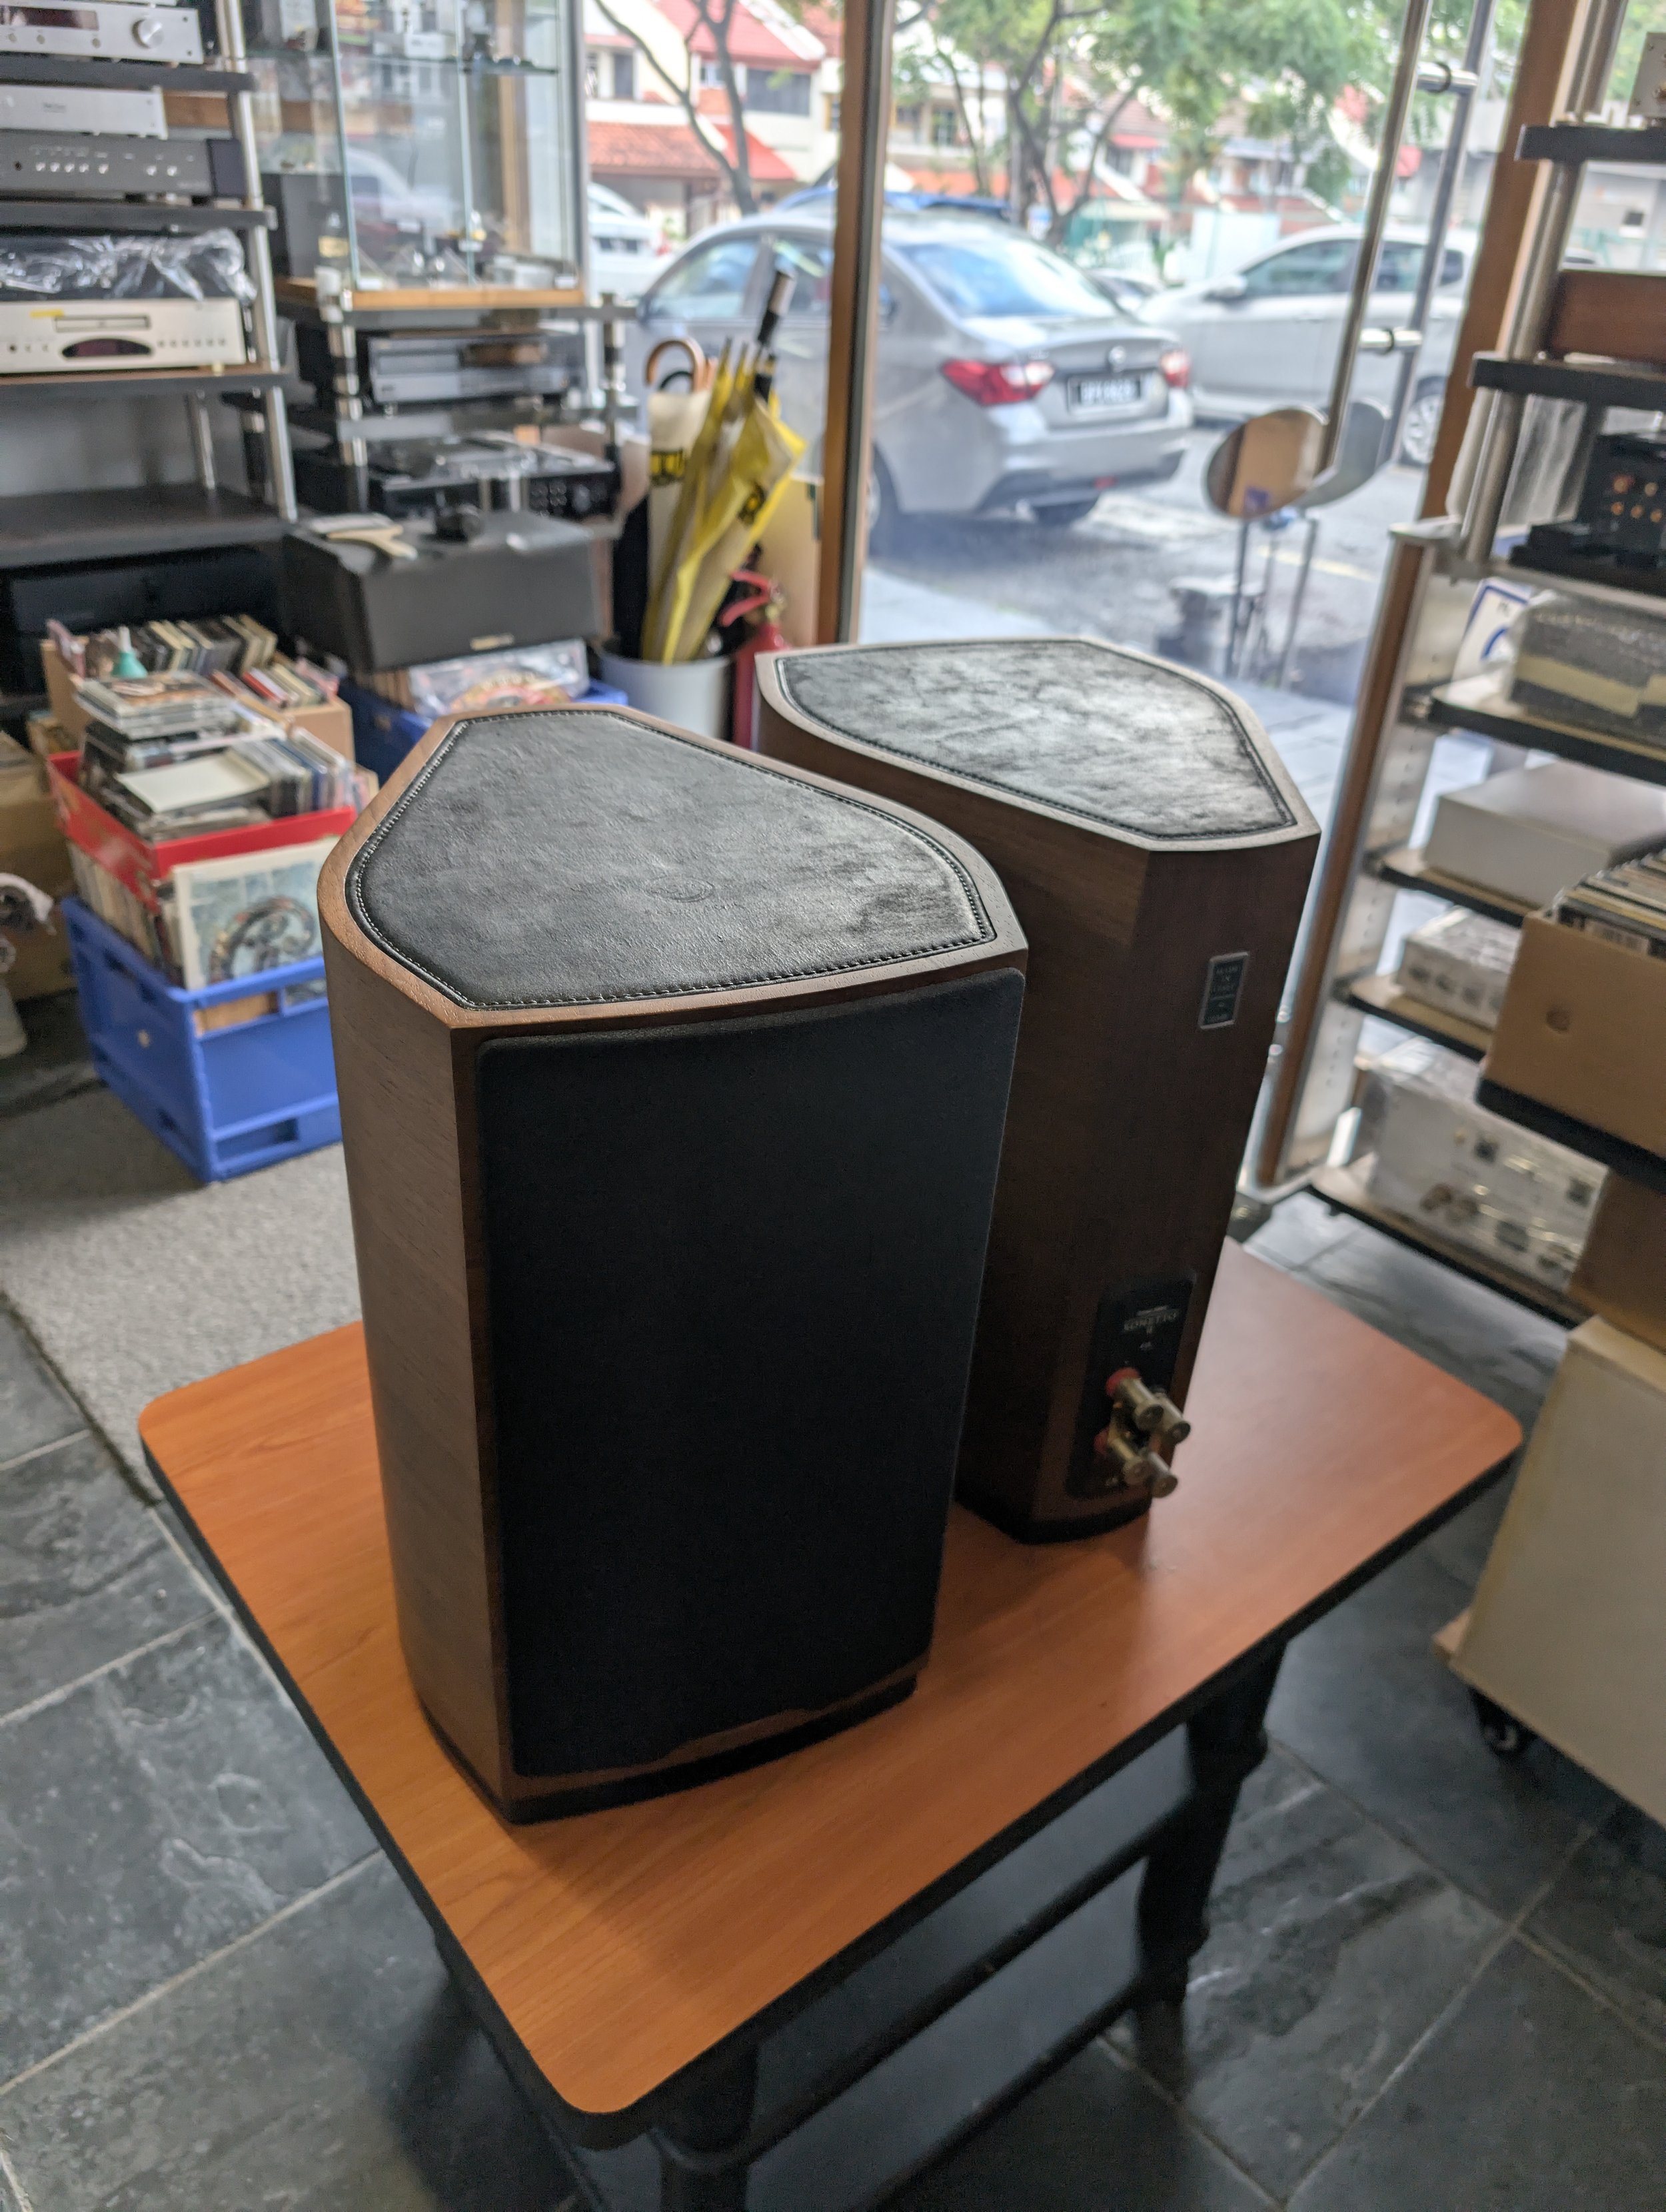
Final Product:

Testing phase
I tried to put some leather dye, which are supposed to fix automotive leather seats, on some polyester fabric first to test its results. There are 2 colours, charcoal and grey. And I tested them both. This is somewhat of a conclusive test as it is often cotton or polyester are often the base of PU synthetic leather.
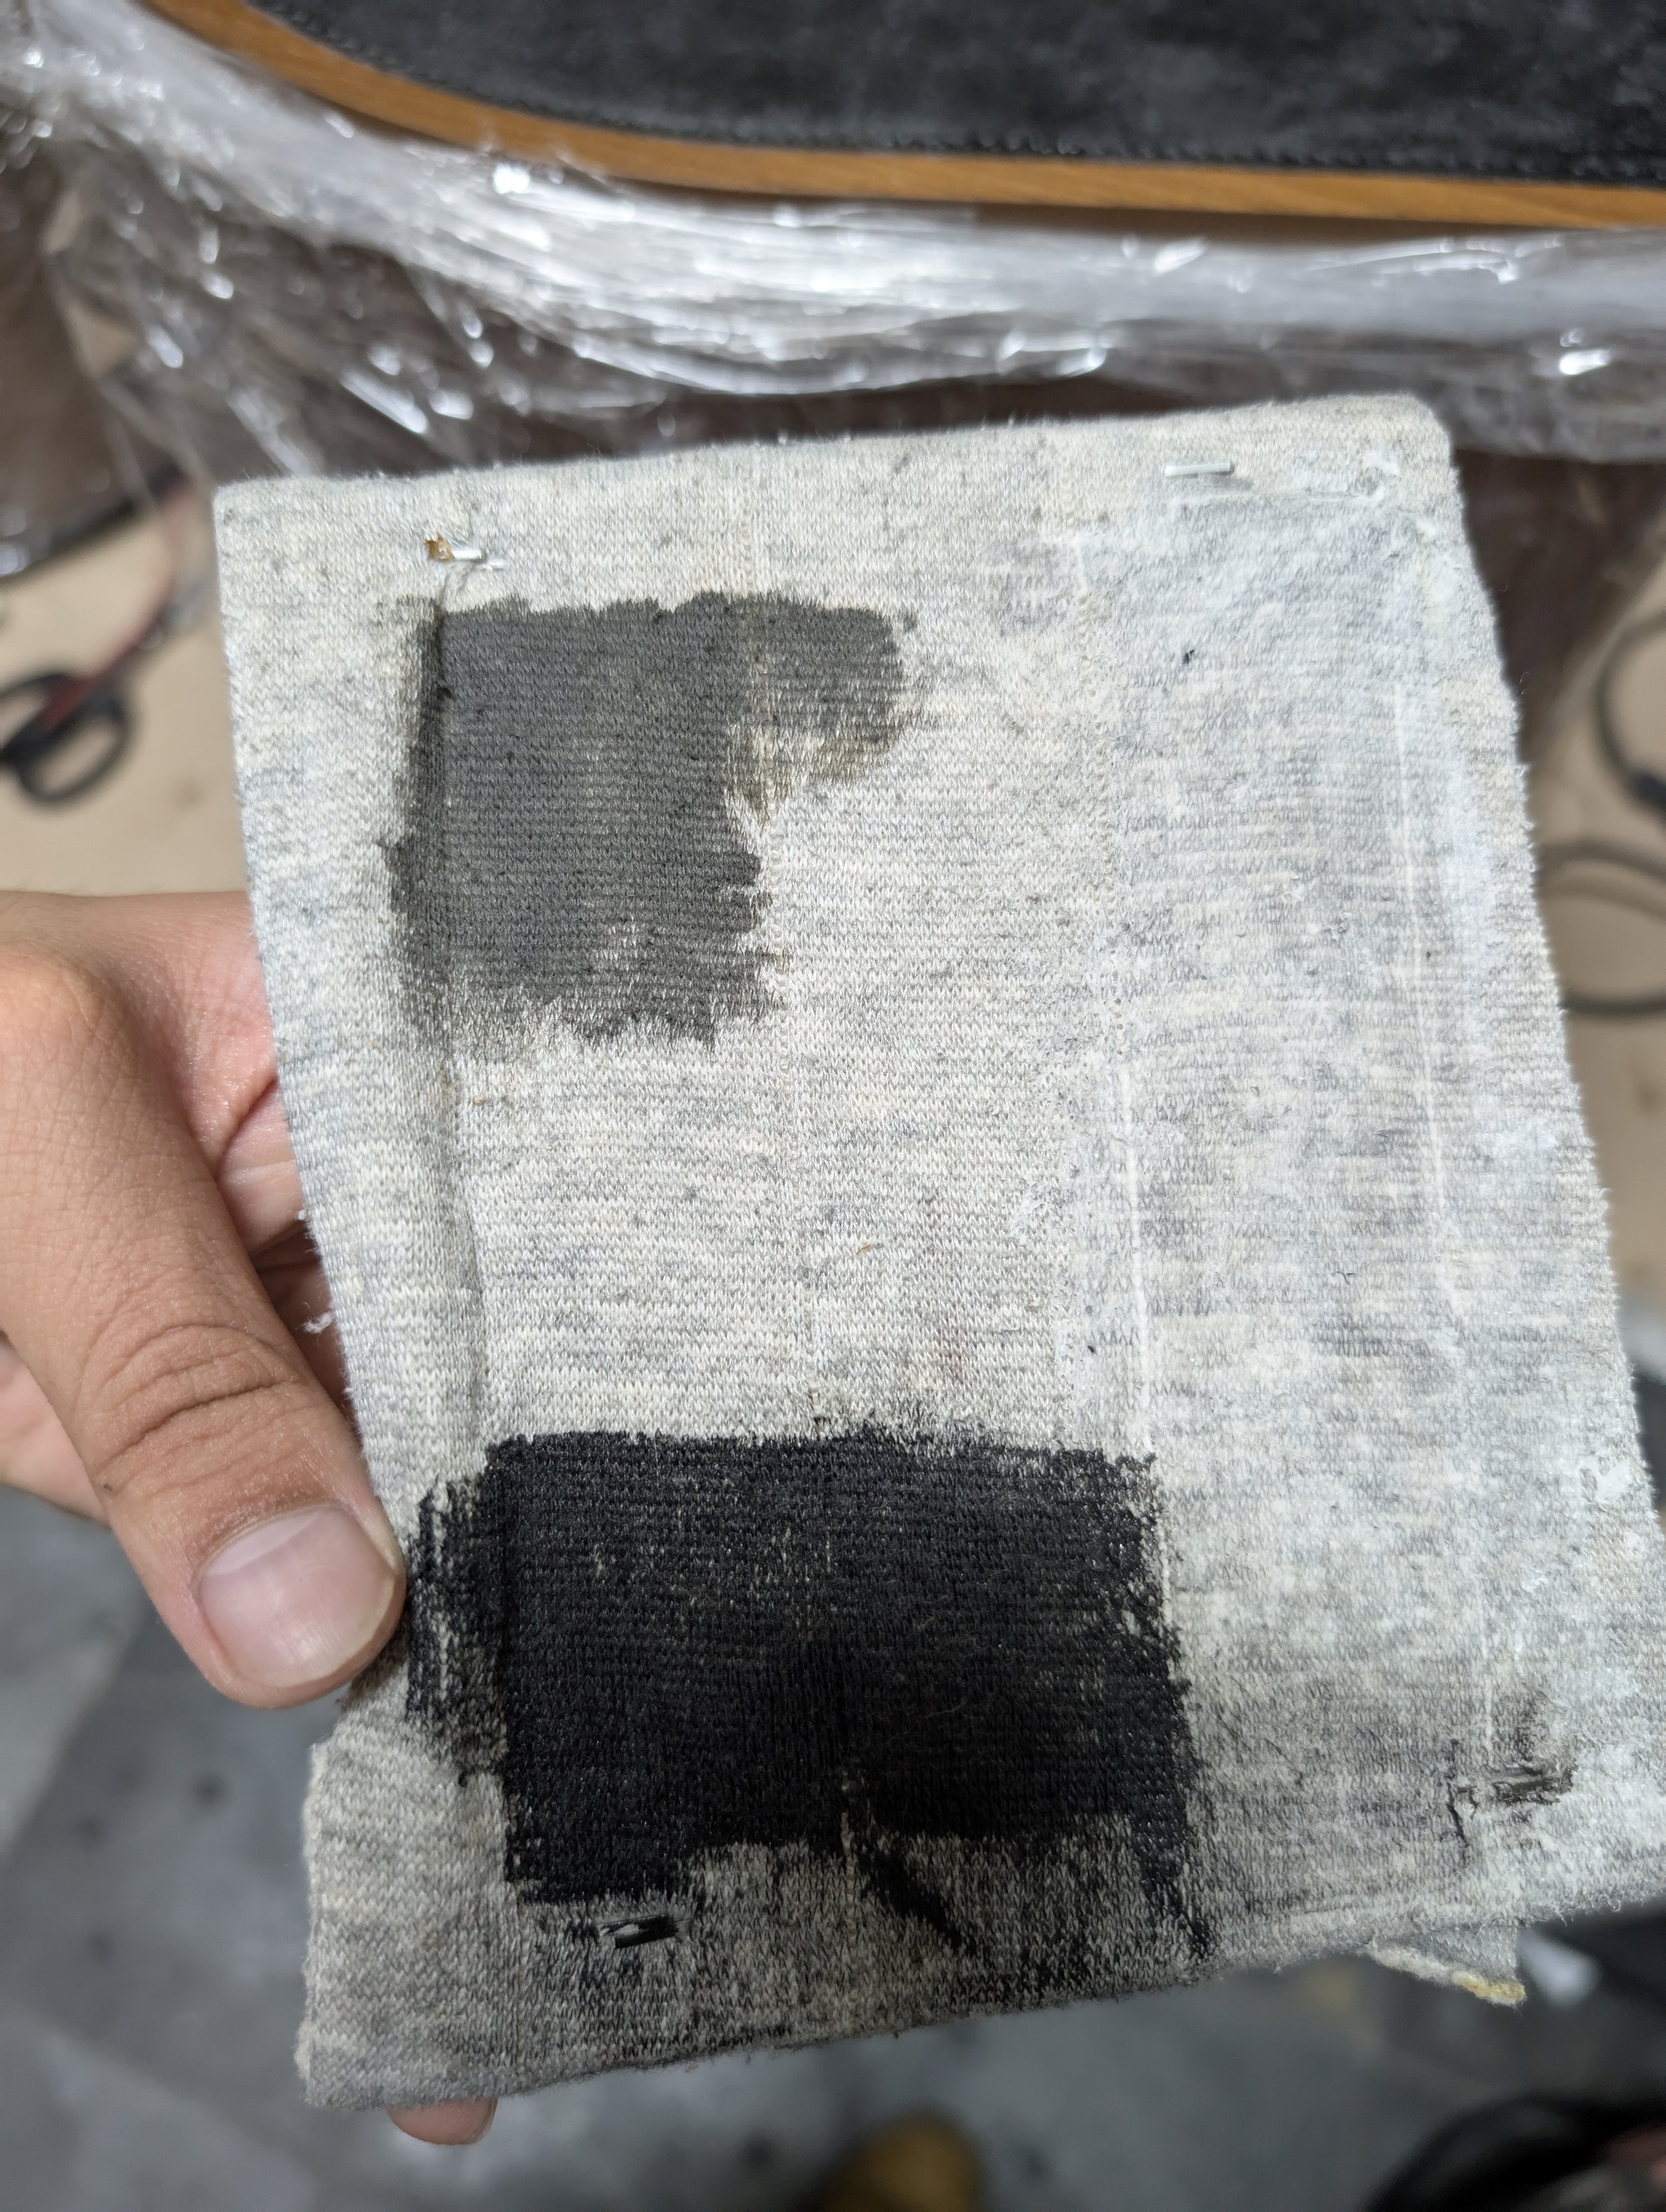
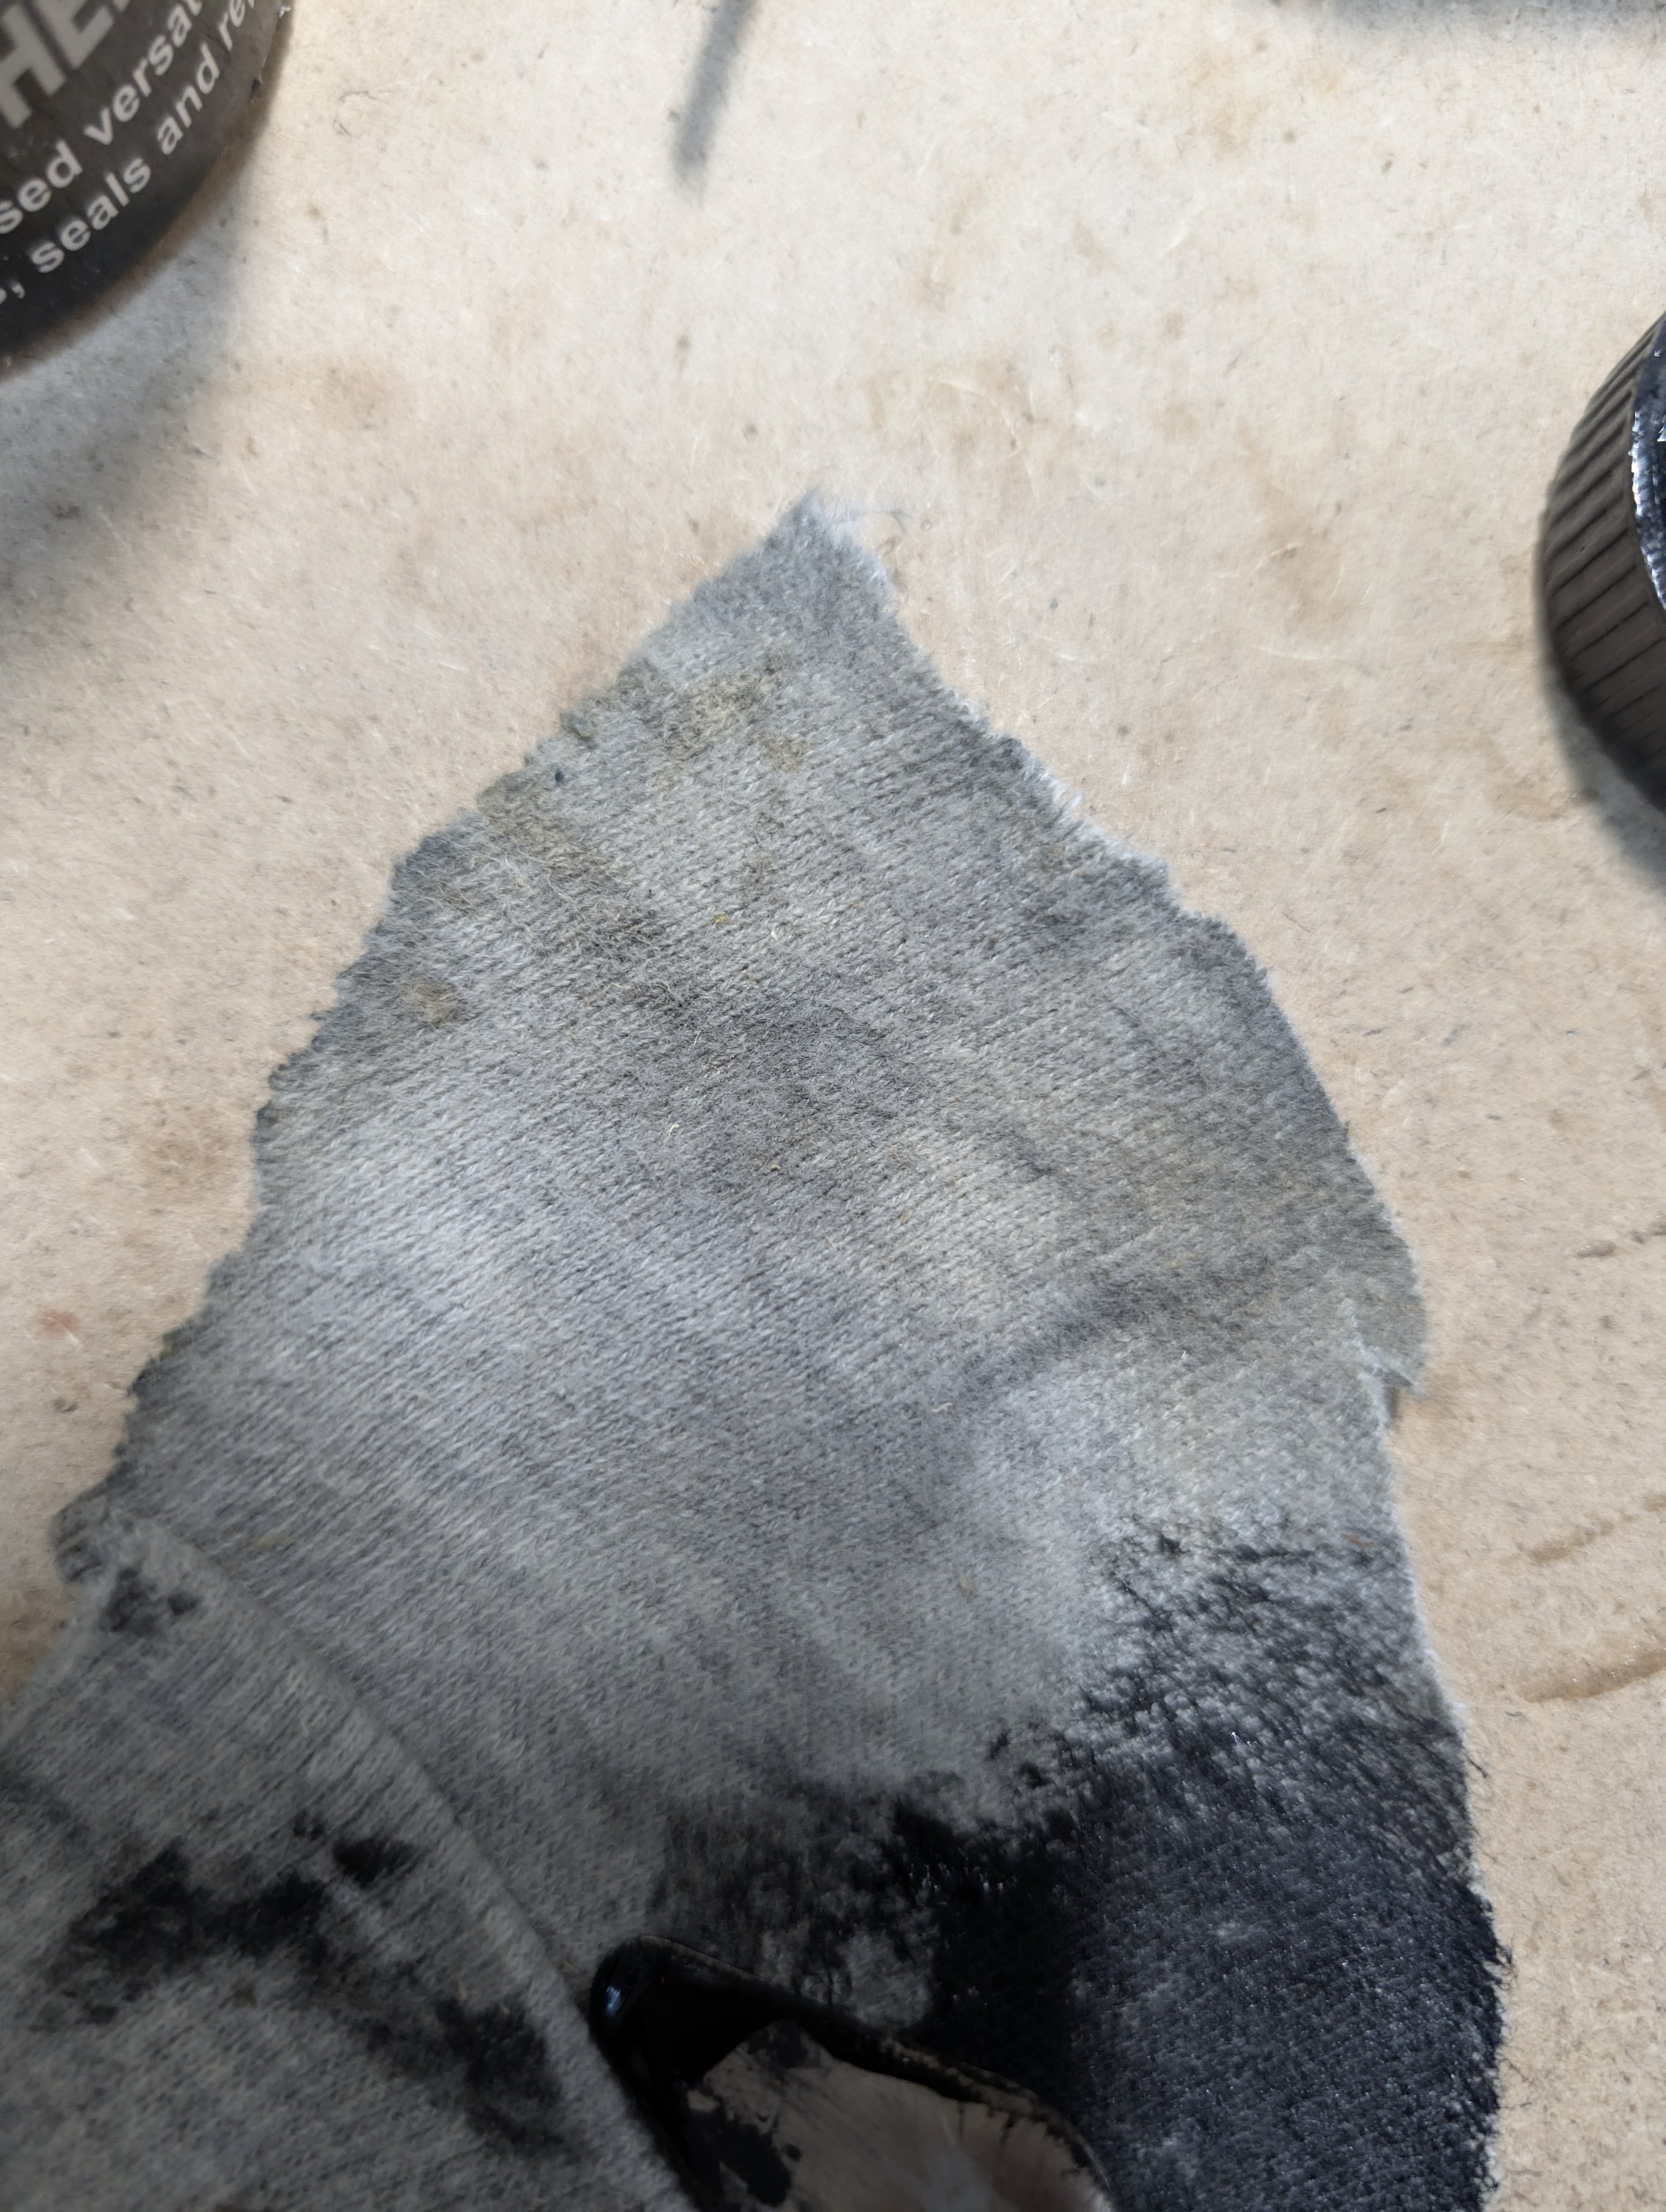

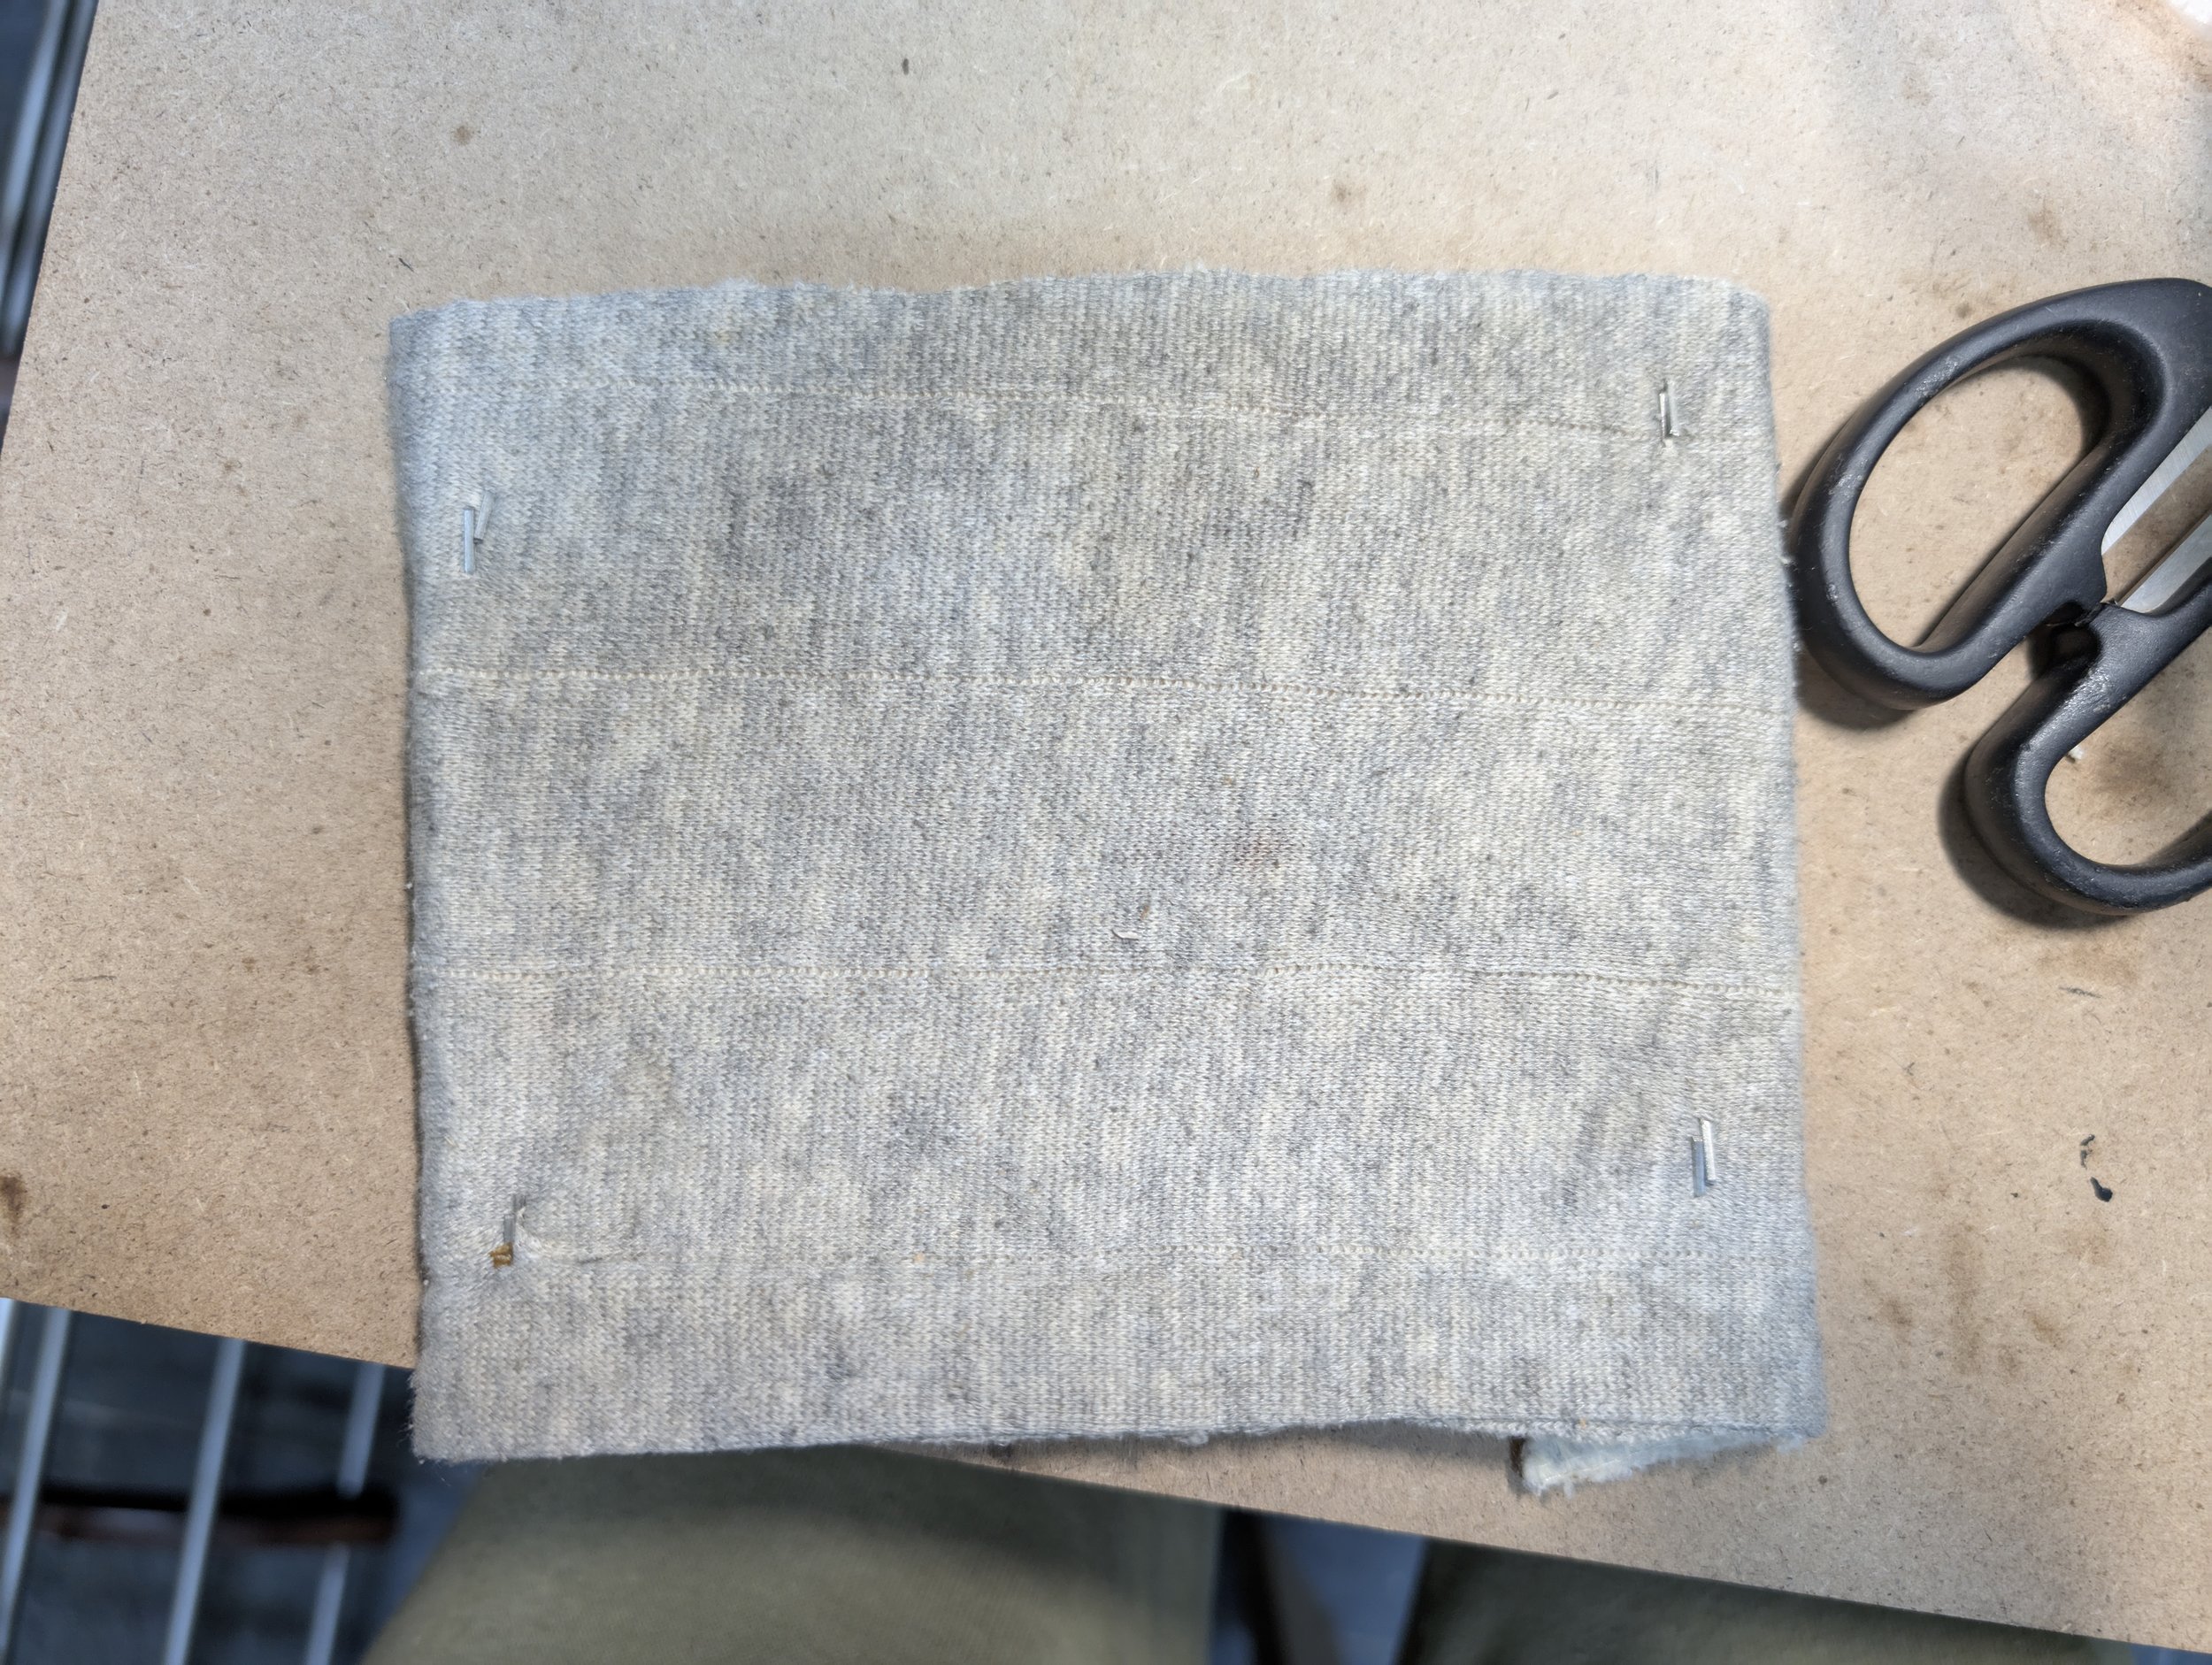

Leather dye result
This is what it is supposed to look like with the leather dye. Ya… Not the prettiest.
Process
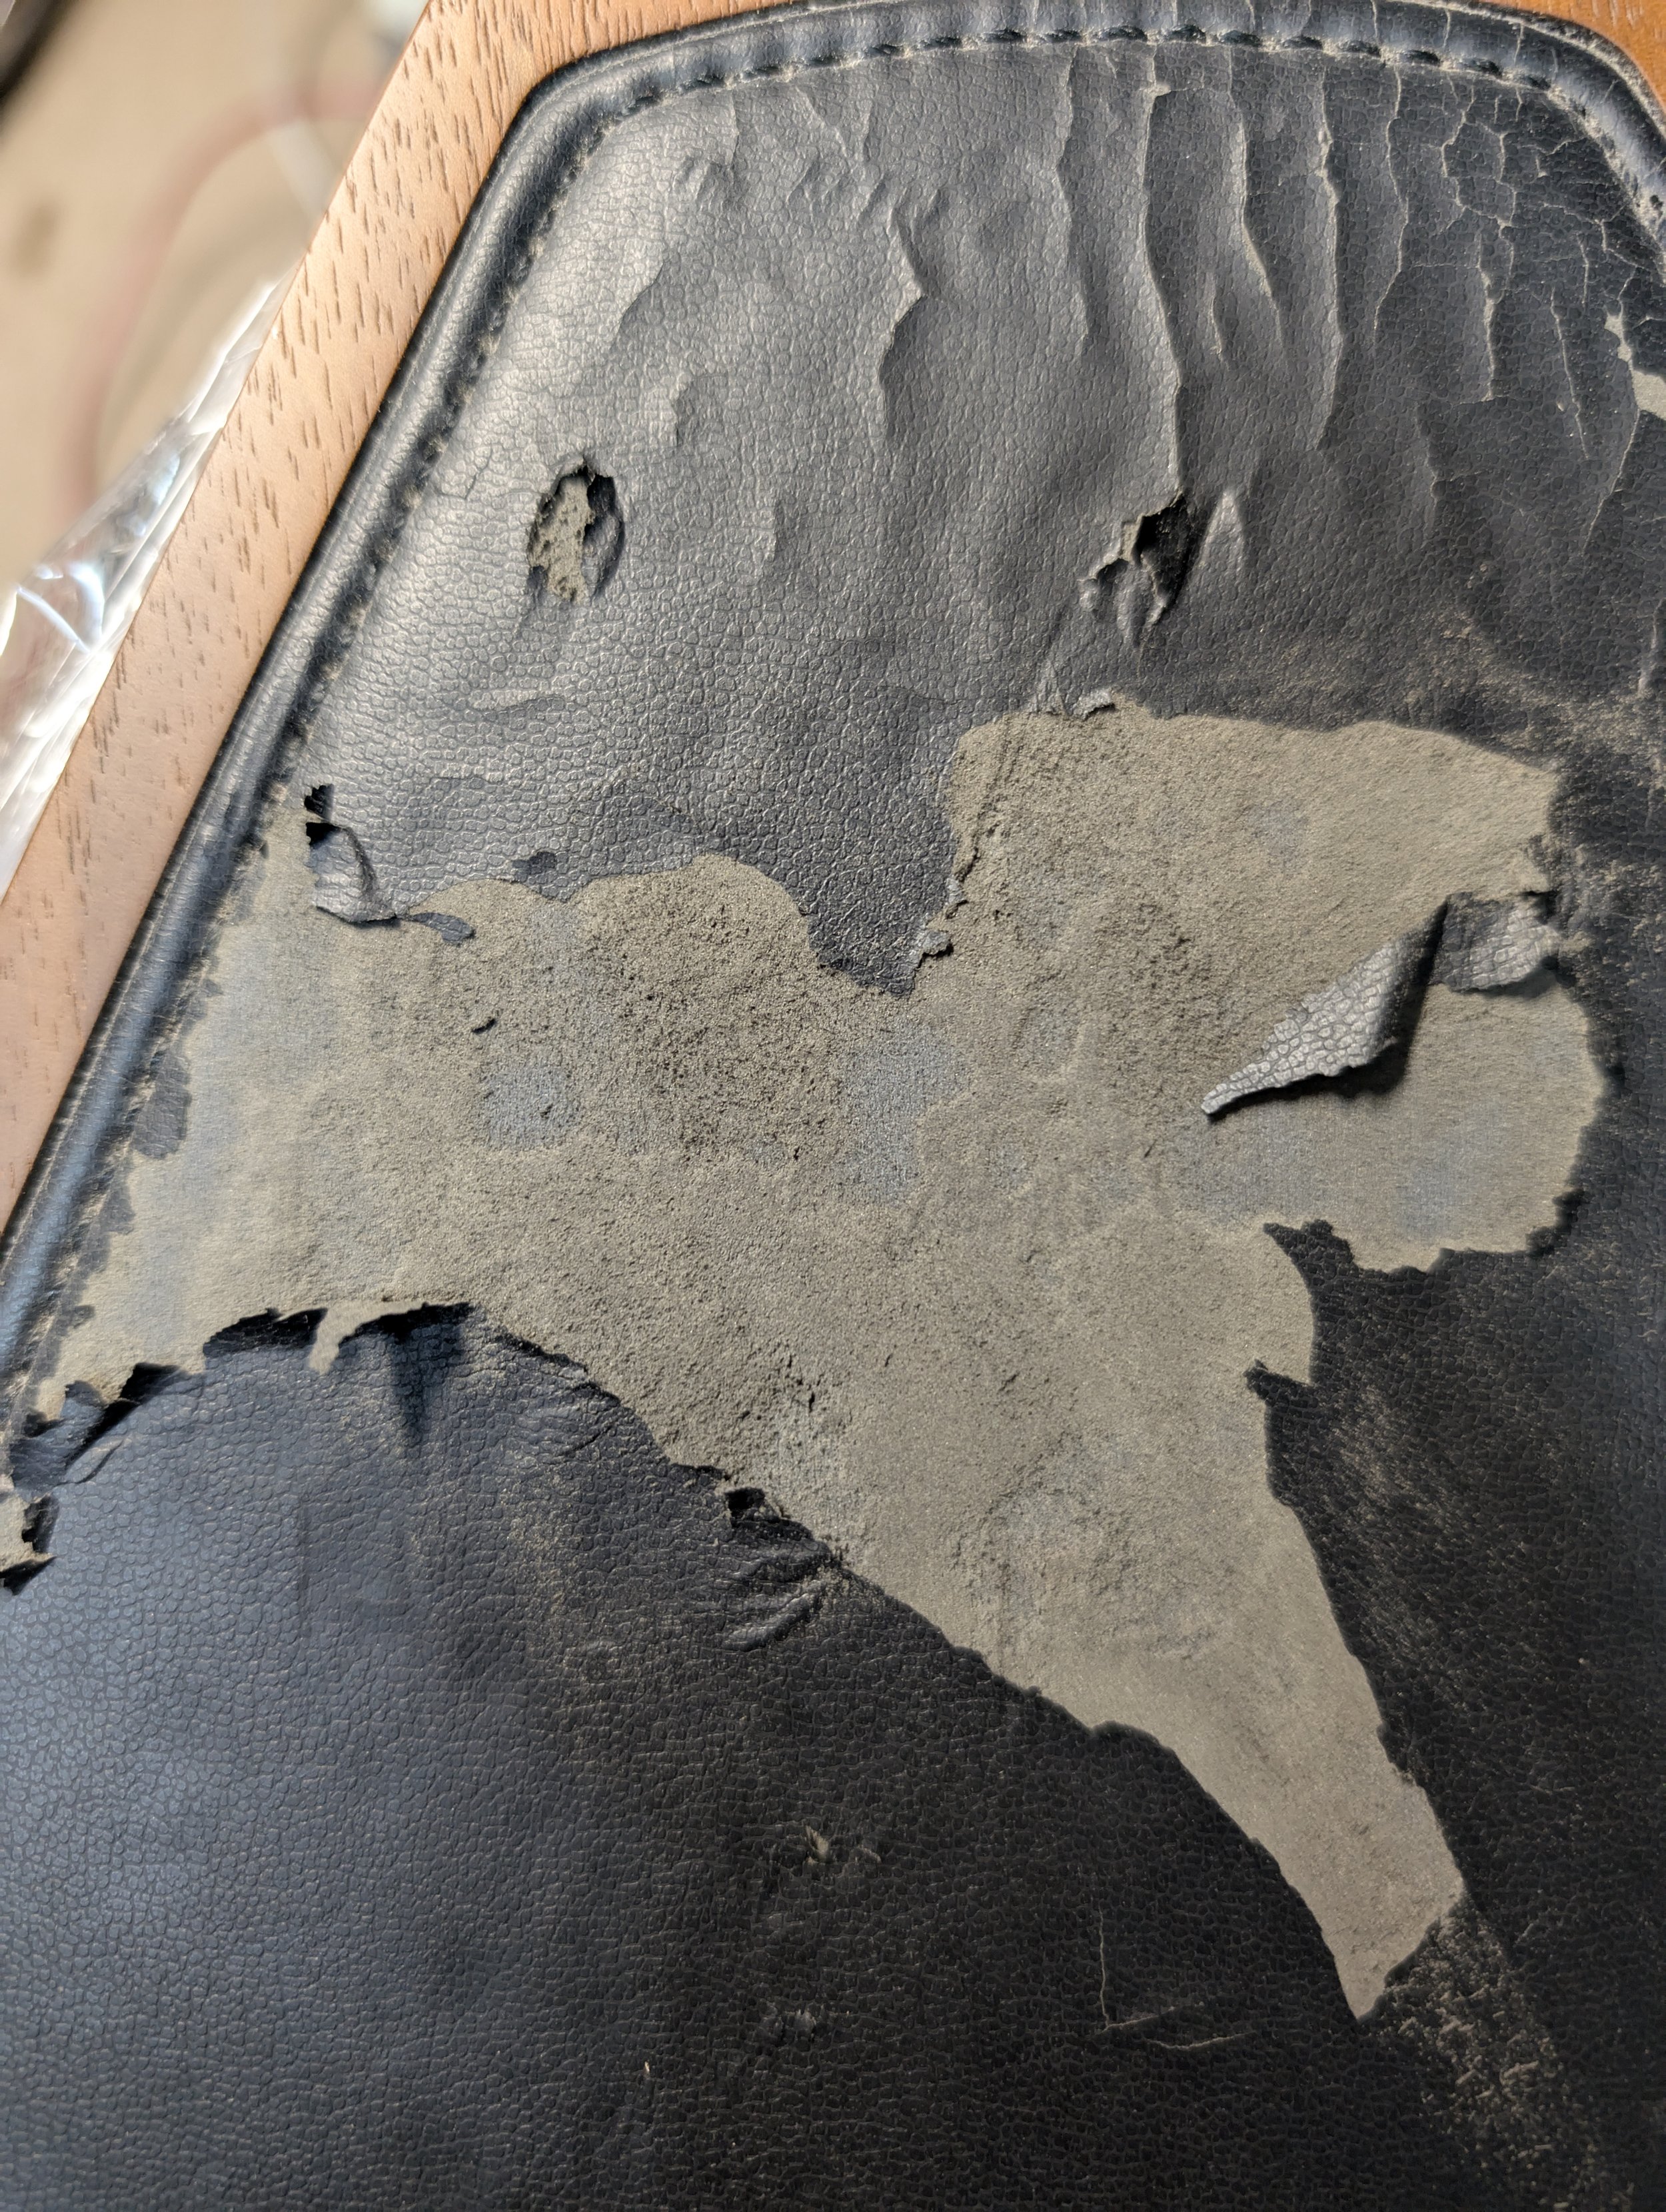
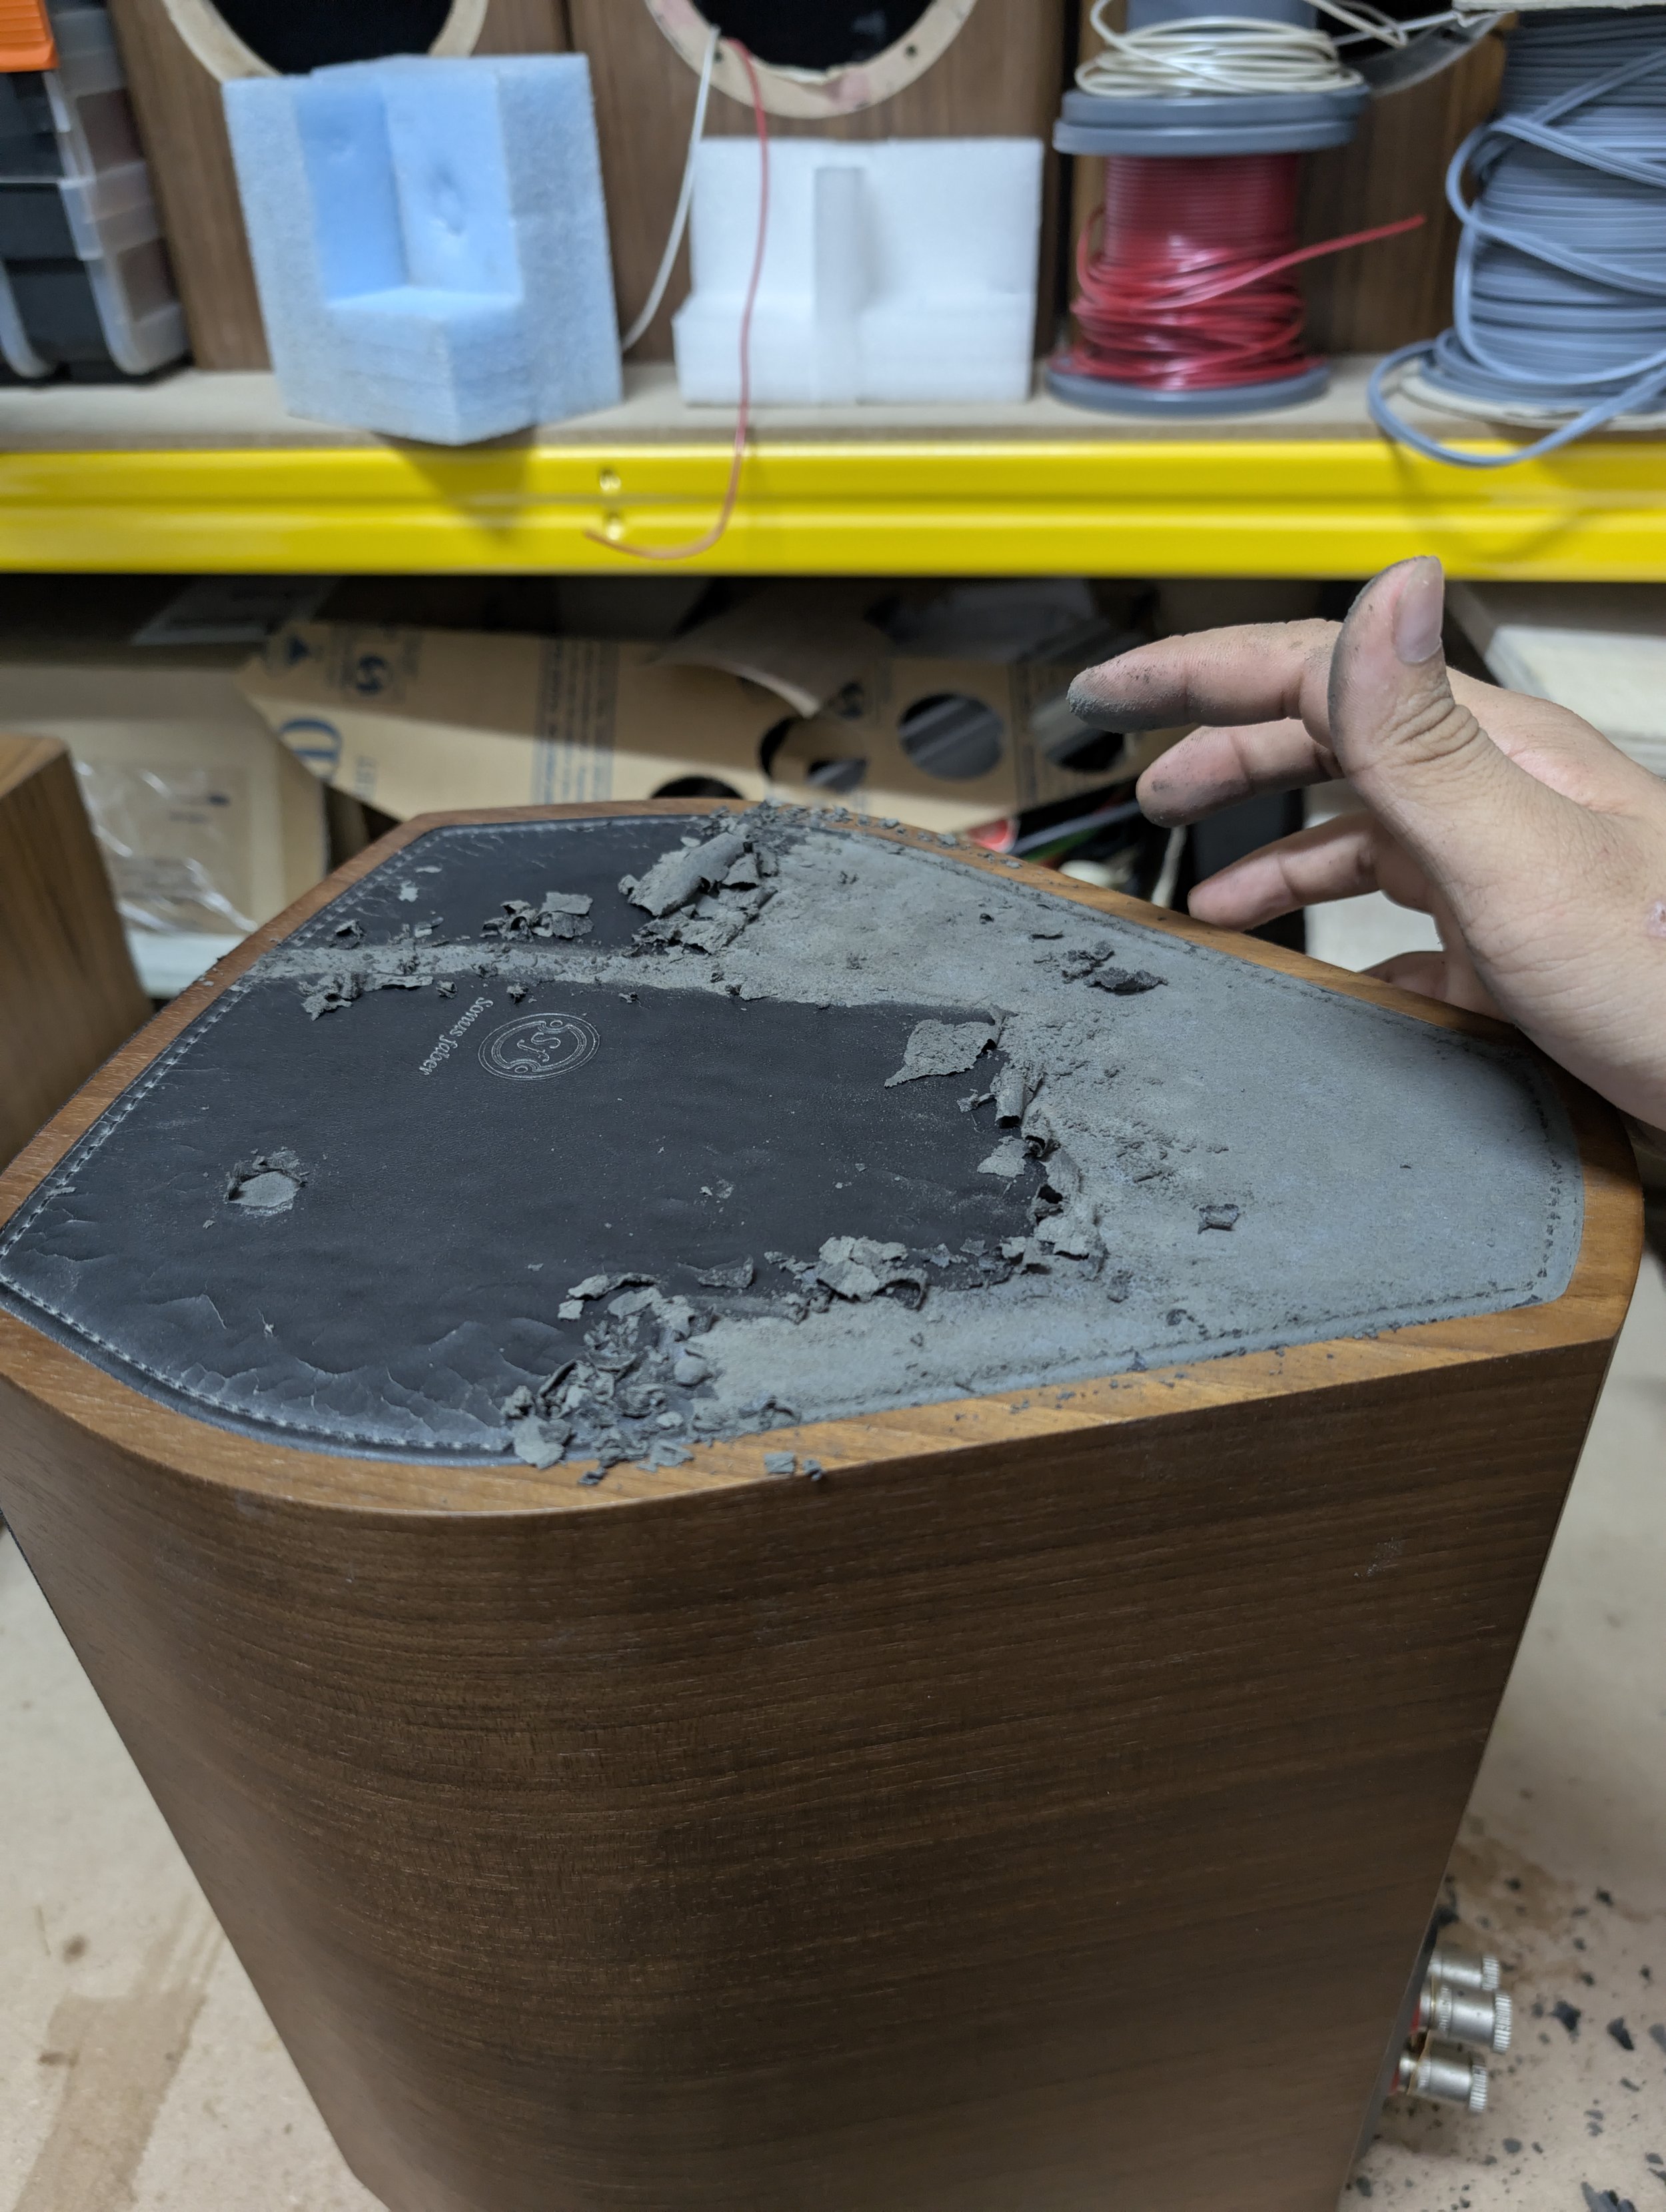
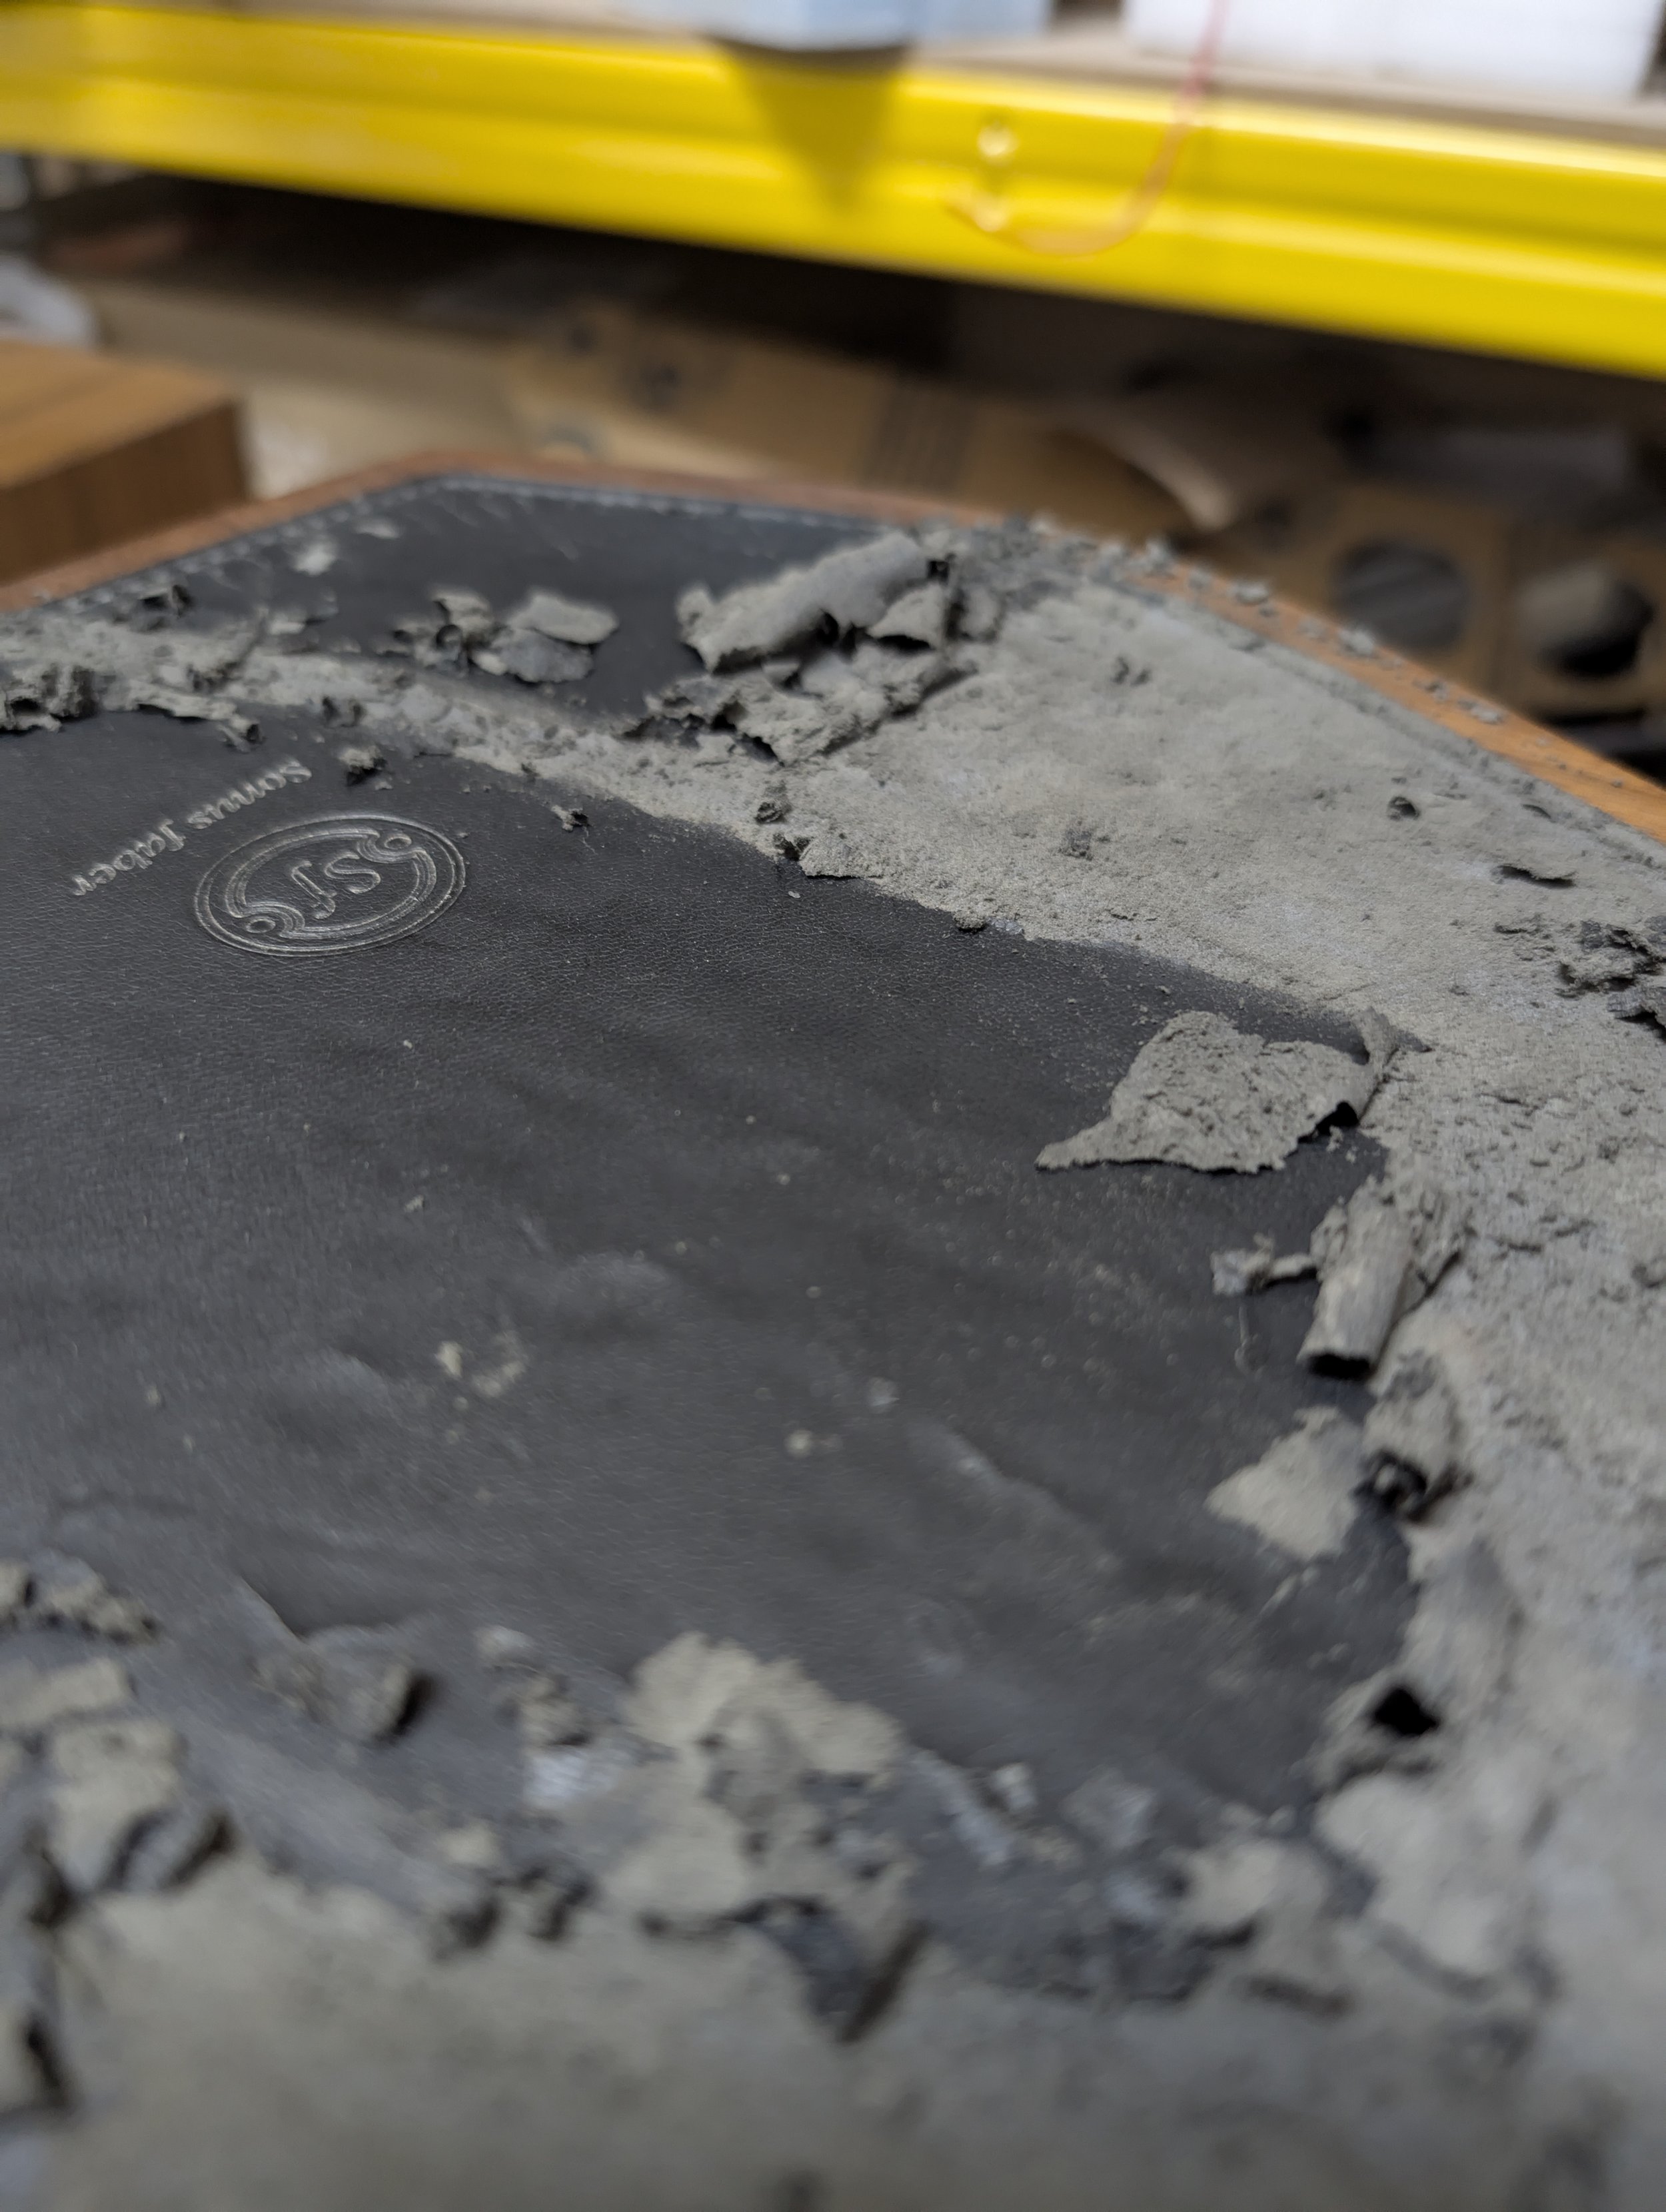
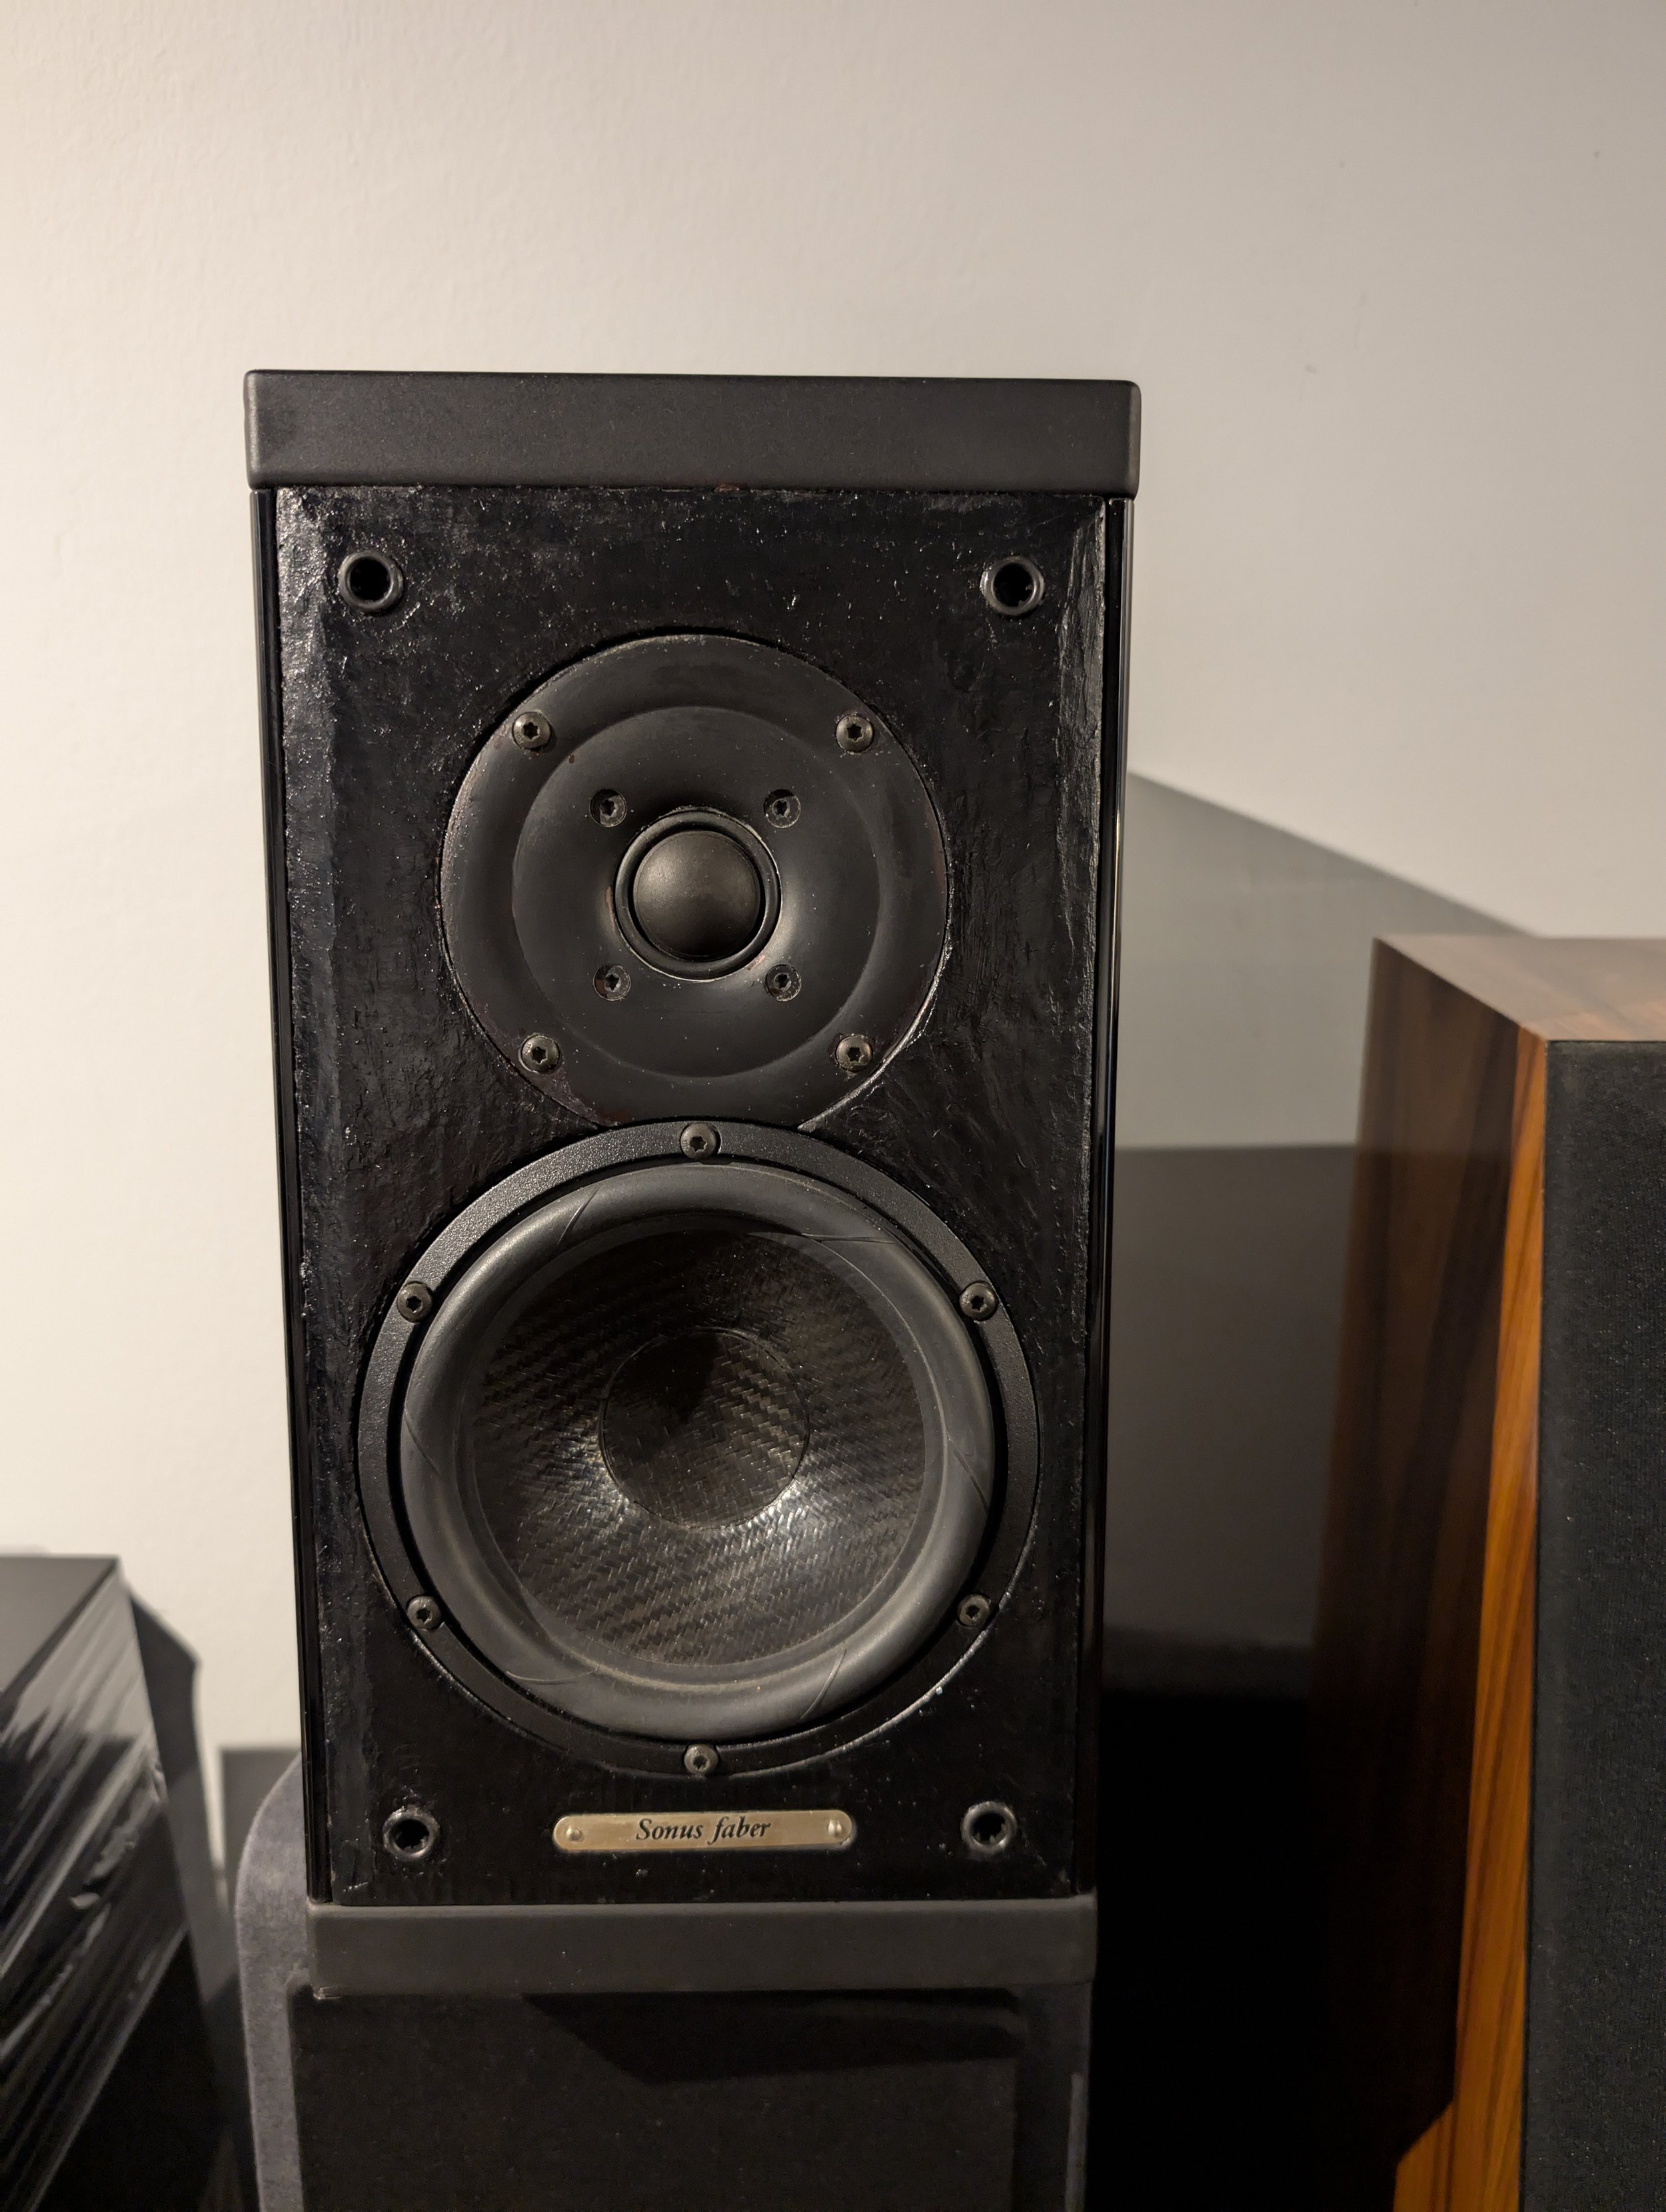
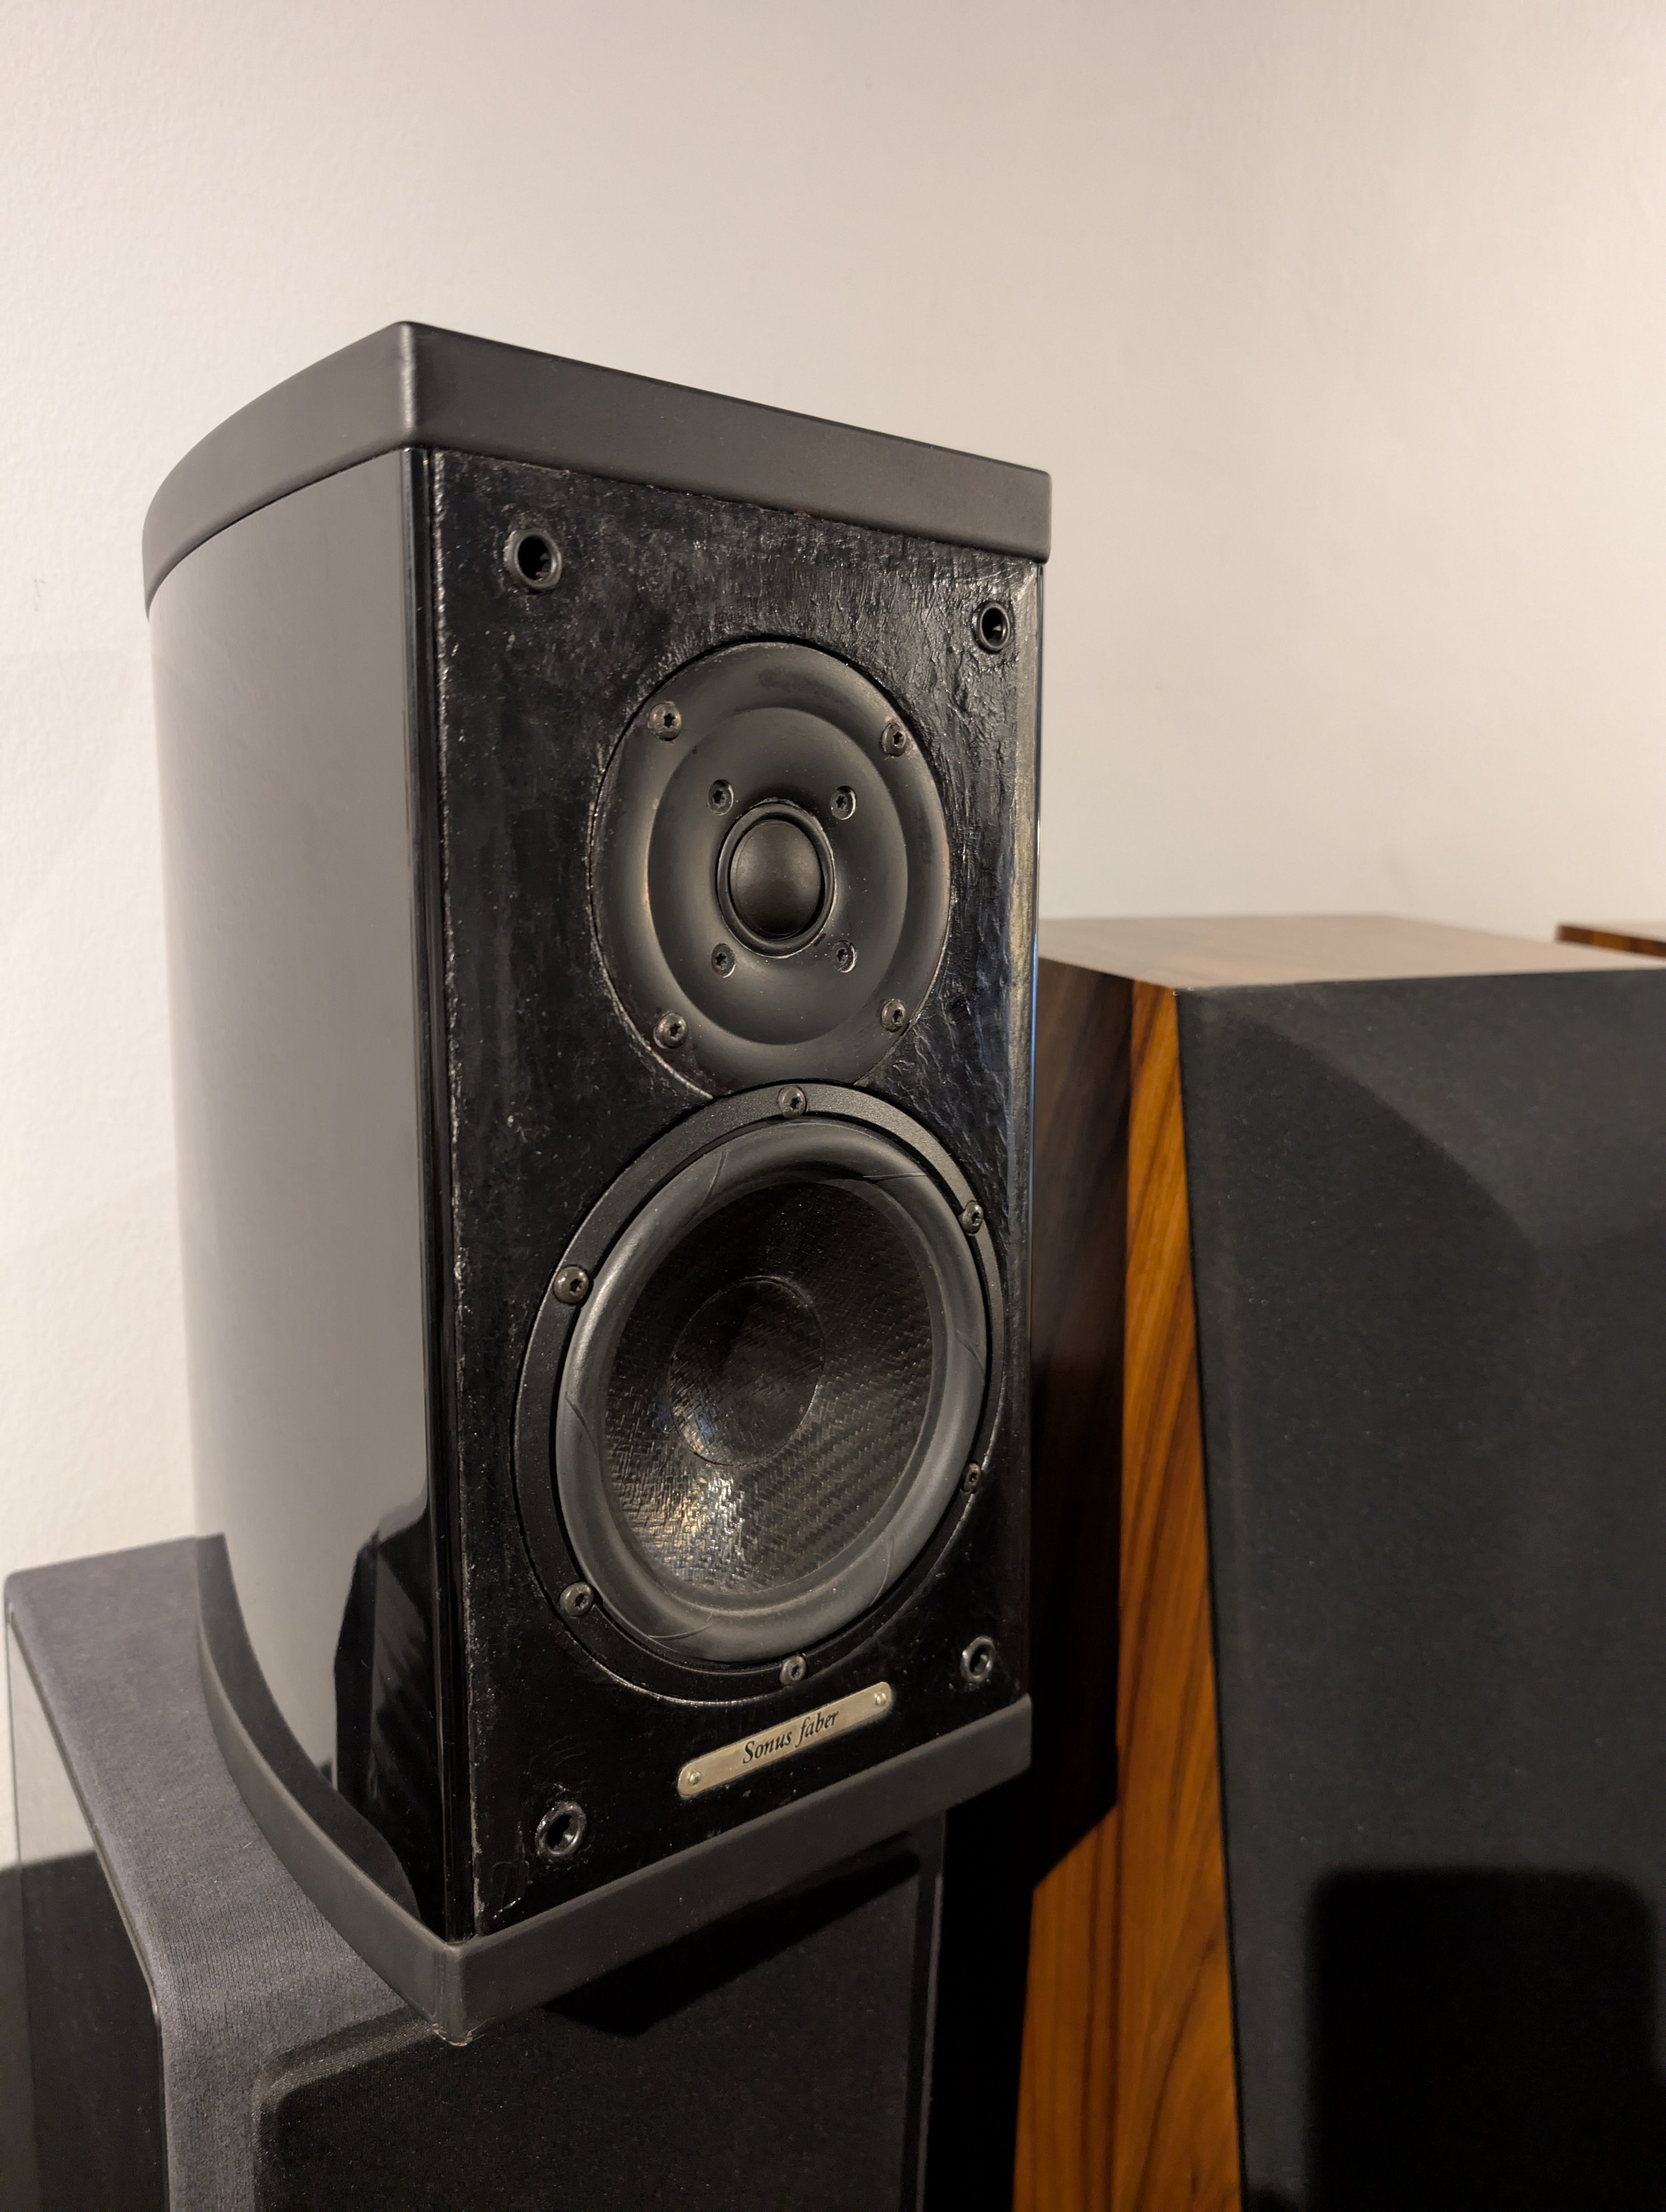
As the leather was soooo worn out, I could flake the whole thing off with just my finger. It is a shape that the “Sonus Faber” logo couldn’t be preserved, but it is the best I could do with my current knowledge.
We did also toyed around with the idea of putting on polished leather wax after the final result. However, we didn’t go through with the idea, as my boss believed that it already look good on the top already, and didn’t want to ruin it.
From this I think I would need to do another one of this leather refurbishment and find out whether a leather wax on top would look good.